Sweet & Tangy Marinated Tofu Bowl w. Pickled Strawberries

In my world, there is one rule for cooking: cook smarter not harder

so when you make this recipe, it’s basically like making lunch WHILE doing meal prep. Convenient, eh? (If you have low spoons, there are tweaks for you too!).

The reality is, so many people I talk to are simply sick of cooking, and it’s a daily chore they handle with varying levels of exasperation. Some are driven by the simple need to get fuel into their body, while others trudge through mealtime, bored & wishing they had more motivation, energy and creativity to cook tastier meals.

My cooking ethos is simple; making meals that pack restaurant quality flavor at home, should be easier. It should be more accessible. And it should be less exhausting. This recipe embodies those principles.

A combination of a few simple ingredients, given a tiny bit of extra TLC, can (and will) blow you away. And if I am ever going to present you with a recipe that involves many ingredients and numerous steps, I promise it’s because it’s going to pay off.

Making a large batch of each of this dishes numerous components means you’ll have delicious food to reach for all week long. From a crunchy quinoa topping you will want to put on everything, to tangy pickled strawberries that will blow your mind, to simple savory lentils that will help keep you fed. And when you sit down to enjoy how this orchestra of flavors and textures comes together in one bowl, you’re going to be SO glad you trusted me on this.


Sweet and Tangy Marinated Tofu Lentil Bowl with Pickled Strawberries

4-6 servings (store each component individually for ideal use throughout the week)

  • 1 cup lentils of choice, or 1 cup pre-cooked lentils

  • 1 cup rinsed quinoa, or 1 cup pre-cooked quinoa

  • 14 oz block of extra firm or firm tofu

  • 1/3 cup coconut aminos or tamari (soy sauce works too)

  • 1.5 Tbsp rice vinegar

  • 3/4 Tbsp honey, brown sugar or maple syrup

  • 1/2-1 medium garlic clove, finely grated

  • 1/4 - 1/2 teaspoon fresh ginger, finely grated

  • 1 tsp Mr. Bing sriracha, or to taste

  • 1/2 lb (8 oz) of firm, clean strawberries 

  • 1 cup white balsamic or other mild vinegar like rice vinegar

  • 1 tsp sugar

  • 1/2 teaspoon kosher salt

  • 1 small bunch scallions

  • 1 mild or hot red pepper, Thai chili 

  • 1 small ripe avocado 

  • Extra virgin oil

Prep Lentils

If not using pre-cooked lentils, which is a great time-saving hack, start by cooking 1 cup of lentils in a pot according to package directions. You can prepare more if you want an extra big batch for a large household or to freeze some.

Prep Quinoa

While lentils cook, prepare quinoa (again, if you have low spoons use a pre-cooked option). Cook at least 1 cup so you have leftovers. Once the quinoa is cooked, drizzle with olive oil.

Pre-heat an air fryer or your oven to 400F. Lay quinoa out in a single even layer (on air fryer insert/basket with a piece of parchment, or on a sheet pan) and toast for 15 minutes, stirring every 5 or so minutes, until crispy and dark golden brown. Toss with sea salt when hot and store in a Tupperware.

Prep Marinated Tofu

Drain liquid from tofu packaging & then to remove additional excess liquid, microwave tofu in a bowl for 2 minutes.

Pour out any released liquid, then press tofu under a heavy object between 2 sheets of paper towels another 15-30 minutes. Then cut tofu into small squares and in a bowl, marinate with below ingredients: 

  • 1/3 cup coconut aminos or tamari (soy sauce works too)

  • 1.5 Tbsp rice vinegar

  • 3/4 Tbsp honey, brown sugar or maple syrup

  • 1/2-1 medium garlic clove, finely grated

  • 1/4 - 1/2 teaspoon fresh ginger, finely grated

  • 1 tsp Mr. Bing Sriracha, or to taste

Marinate for at least 10-15 minutes. Then top with 1/2 cup scallions cut on the bias, and 1/4 cup red chili cut on the bias, adjusting the amount of chili for how hot your pepper is. Store in the fridge up to 5 days.

Final Step: Prep Pickled Strawberries

While that marinates, to a 12 oz mason jar, add:

  • 1/2 lb (8 oz) of firm, thoroughly cleaned strawberries with tops removed, cut in halves and quarters if large

  • 1 cup white balsamic or other mild vinegar like rice vinegar

  • 1 tsp sugar

  • 1/2 teaspoon kosher salt 

Let strawberries pickle for 15-30 mins and then strain from pickling liquid. Store strawberries in the fridge and use within 2-3 days to avoid mushiness. Pickling liquid can be stored separately in the fridge up to 7 days, and used as a salad dressing, or re-used to pickle more strawberries.  

Build Your Bowl
YOU DID IT! It’s time to build your delicious bowl!

Cut open a ripe avocado and, carefully, using a sharp knife, cut thin strips into the avocado horizontally, then vertically, leaving you with small squares to be spooned into your bowl.

First lay down a bed of lentils. Top with marinated tofu and a spoonful or two of the marinade. Add your avocado and finish with pickled strawberries and plenty of crispy quinoa. Add a drizzle of sriracha if desired & enjoy! 

*This recipe includes links to my Amazon store which earns commission that supports my recipe development. I only recommend products I truly love!

Lemony Israeli Couscous Pasta Salad w. Frizzled Leeks & English Peas

I’ve never liked pasta salad.

Maybe you’re in agreement that cold noodles never quite carry the punch of flavor you want them to.
Or perhaps you just feel like you’ve cooked your way through every single pasta and orzo salad in existence. Snooze.

Meet Israeli Couscous — often confused as a grain, these silky, plump little balls of heaven are actually toasted balls of pasta that originated in Israel in the 1950’s when there was an influx of immigrants and limited supply of rice.

The texture of Israeli Couscous is positively delightful and carries the creamy, zesty and savory flavors of this dish in every bite: umami leeks, fried until golden brown. Bright green peas with a subtle sweetness that tastes like what spring feels like. Tangy sour cream and capers. Lemon zest and fresh olive oil finish it off with bold, brightness. Dive in and prepare to wave pasta salad goodbye this warm weather season.


Lemony Israeli Couscous Pasta Salad with Frizzled Leeks and English Peas

Serves 2-4, as a side or main

  • 1 cup Israeli or Pearl Couscous*

  • 1 cup of English peas

  • 1-2 small-medium leeks, trimmed and thoroughly cleaned

  • 2 lemons

  • 1-2 tsps capers

  • 1.5 Tbsps sour cream

  • Brightland Awake, or other bold extra virgin oil

  • Aleppo or red chili flakes, to taste

  • Kosher salt, to taste

Remove dark leek tops. Cut leeks in half lengthwise.

Clean thoroughly with cold water, especially in-between layers to remove dirt. Thinly cut leeks into half moons & set aside.

Set a large pot to boil, 2-3 quarts of water with 2 tsps kosher salt.

Then blanch 1 cup peas: Get a slotted spoon or spider*. In a bowl add up to 10 ice cubes & cold water. Add peas to boiling water & boil approximately 1-minute. Use slotted spoon to transfer peas to ice bath. Then strain after a minute and set aside in a large bowl. Don’t strain water from the pot. Once all peas are removed, add 1 cup of dried couscous to the boiling water. Cook 10 minutes, or until couscous is soft and pillowy. Then strain.

Place a small pan over medium-high heat with olive oil. Add thinly sliced leeks, and cook until frizzled, brown and a little crispy.

To the large bowl with the peas, add Brightland or other olive oil, cooked couscous, a nice big pinch of kosher salt, leeks with any olive oil from the bottom of the pan, 1-2 tsps capers without any juice, juice of 1/2 - 1 whole lemon, zest of 1/2 - 1 whole lemon and 1.5 Tsps of sour cream. Mix throughly and taste, adding more capers, lemon juice/zest or sour cream as you desire.

Serve topped with a small dollop of sour cream, a drizzle of olive oil, a bit more lemon zest and a sprinkle of red pepper flakes or Aleppo pepper. Enjoy immediately when warm, or bring to room temperature from the fridge.

*This recipe includes links to my Amazon store which earns commission that supports my recipe development. I only recommend products I truly love!

Green Pasta w. Citrus Panko "Grattato"

Who doesn’t love a 2-for-1 jackpot?

Yes, this pasta sauce is a perfect way to use up the greens you forgot about in the bottom drawer. But, the magic is you get to walk away with dinner done AND a snackable spinach dip — ready to go for your nibbling pleasure — that comes together in about 30 seconds from the remnants of your sauce. You should know, too, that this recipe has a special place in my heart; an ode to the very first recipe I ever wrote back in 2017. This dish is steeped in personal history, and I hope it feels like a warm hug of gratitude when it reaches you.


Green Pasta with Citrus Panko "Grattato"

Serves 2-3

  • ½ 9 oz bag raw spinach, 4-5 oz

  • 1 small bunch raw kale, 6-7 leaves

  • 2 Tbsps of cottage cheese, or vegan alternative 

  • 1 heaping Tbsp goat cheese, or vegan alternative

  • ½ anchovy fillet

  • 4-5 scallion ends, or 1-2 cloves garlic

  • 1 whole lemon

  • 10 - 12 oz Pipette

  • Grated fresh pecorino, or parmesan  

  • Kosher salt, to taste

  • Olive oil

Optional, Panko Grattato:

  • 2-3 Tbsps olive oil, butter or vegan alternative

  • ½ - ¾ cup panko

  • 2 garlic cloves, grated

  • Pinch of chili flakes

Pan Grattato Instructions

If you plan to make the breadcrumbs (which are optional but SO good & easy), to a pan add 3 Tbsps EVOO & 2 cloves grated garlic. Place over low heat just until garlic is fragrant, 1 minute. Add ½ - ¾ cup panko. Turn up heat and stir constantly, until panko is browned all over. Remove from heat & add salt & chili flakes, to taste.

Sauce Instructions

Start a large pot, 3-4 quarts of water, over a high heat to boil. Wash spinach & kale, if needed. Remove kale leaves from tough stem.

When water boils, add 2 tsps salt. To boiling water, add kale and using tongs or a large spoon, press down to submerge. After 1 minute, add spinach and submerge. After another minute, do not drain pot into the sink — remove spinach from the boiling water using a slotted spoon, tongs or spider strainer, placing blanched greens directly into a blender or food processor.

When all greens are removed from the boiling water, immediately add 10-12 oz pipette, cooking 7-8 minutes until al dente, or follow package instructions for the pasta you’re making.

To the blender with the greens, add 1.5 Tbsps EVOO, 2 Tbsps Cottage Cheese, 1 Tbsp goat cheese, ½ anchovy fillet (more if you like anchovy), 5-6 scallion ends (1-2 garlic cloves if you don’t have). When the pasta is almost done, add 2-3 large spoonfuls of pasta into the blender, along with juice of ½ a lemon and blend until smooth. Salt to taste.

Strain cooked pasta & place back into the empty pot. Place the strainer over the pot & pour about half of the blended sauce into the strainer. Using the back of a large spoon, press down until all the liquid has been strained into the pasta. Set aside what remains of the “pulp” from the cooked greens.

Add the remaining blended sauce to the pasta, top with fresh pecorino, lemon zest, plus panko grattato if you opted to make it.

BONUS DISH: Take what remains of your “pulp” from the cooked greens, add 3-4 Tbsps sour cream, cottage cheese, plain yogurt, labne or vegan alternative. Mix, salt to taste and serve as a take on spinach dip!

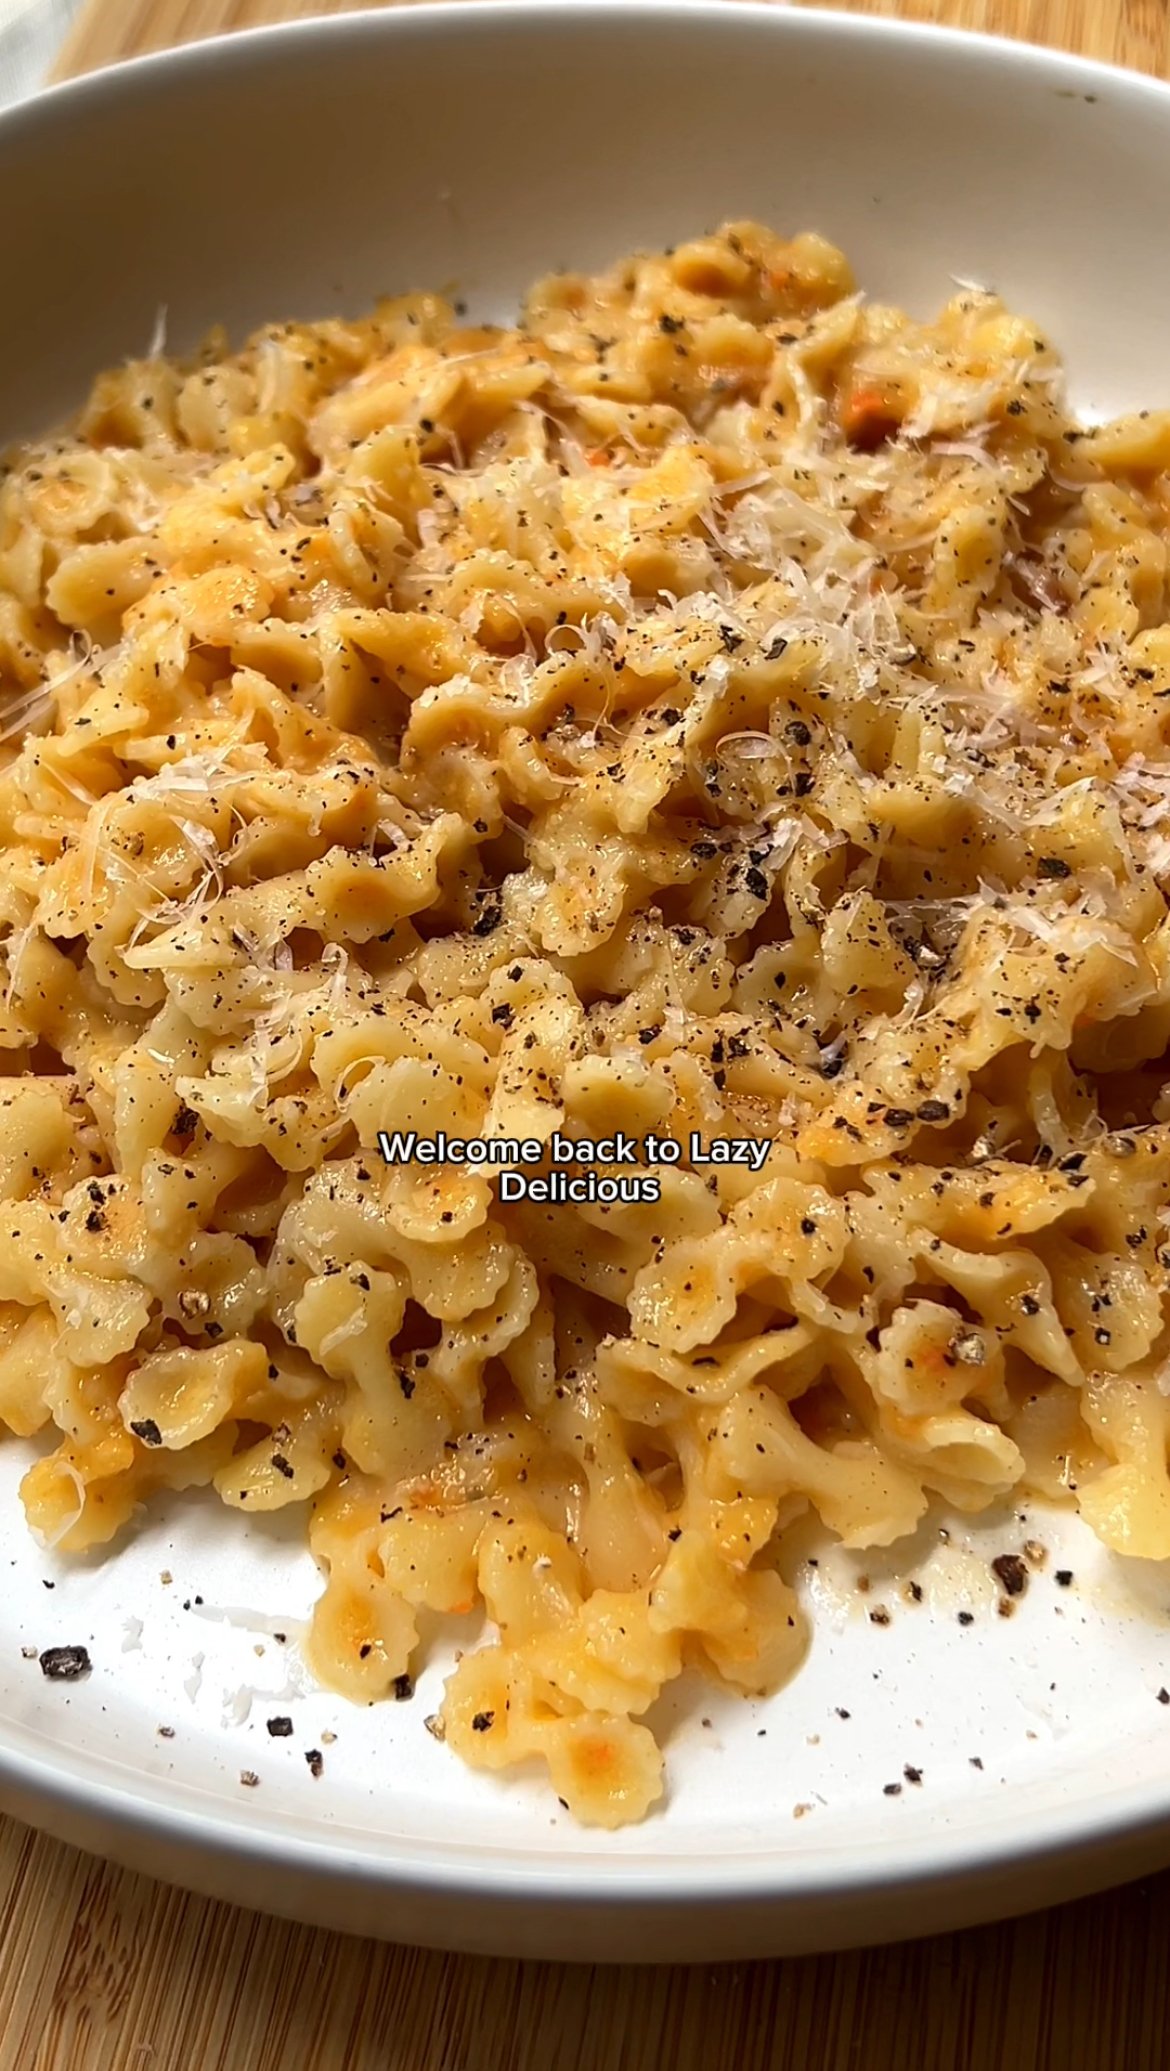
Farfalline in Carrot Miso Sauce

This 7-ingredient recipe (okay, 8!), is hygge for your tastebuds.

It's an umami, veg-packed farfelline that is like a cozy middle ground between soup and pasta. And it's a perfect opportunity to use up carrots that spent a few days too many in the bottom drawer. Trust me when I say, you need to make this.


Farfalline in Carrot Miso Sauce

Serves 2

  • 1 small bunch tri-color carrots, like Cal-Organic

  • 1/4 cup broth (veg, bone, chicken — any kind works), adding more as needed

  • 2 whole garlic cloves

  • 2 Tbsps Shiro Miso, or other miso paste

  • 1-2 Tbsps Butter or vegan alternative

  • Parmigiano-Reggiano or vegan alternative like nutritional yeast

  • 1 cup Farfelline

  • Freshly ground black pepper

  • Kosher salt, to taste

Preheat your oven to 400F and start a pot of water to boil for your pasta.

Rinse + peel your carrots and place on a baking sheet.

Then in the microwave, melt 1 Tbsp of butter or vegan alternative. To your warm butter, mix in 2 Tbsps of Shiro miso, or other miso paste.

Coat your carrots evenly all over with your butter and miso marinade, then top with 1-2 whole crushed garlic cloves. Roast carrots in the oven until carrots are tender all the way through, 10-20 minutes or more, depending on the thickness of your carrots.

Place roasted carrots and whole garlic in a blender or food processor along with 1/4 cup of broth and blend until smooth.

Salt your boiling pasta water, add farfalline and cook until al-dente, 5-6 minutes. In the meantime, add 2-3 spoonfuls of your starchy pasta water to the blended carrot sauce, along with 1/2 cup of loosely packed, freshly grated parmigiano-reggiano or vegan alternative, like nutritional yeast.

Blend to combine, taste and add salt, only if needed.

To your cooked, strained pasta, mix in another Tbsp of butter along with another 1/4-1/2 cup freshly grated parmigiano-reggiano (or vegan alt), lots of freshly ground black pepper and your carrot sauce.

Adjust the thickness of your sauce by adding more bone broth as needed. Finish with cheese and pep, and enjoy!

Olive & Lemon Fazzoletti (Handkerchief Pasta)

Hear me out. Have you ever craved a food that evokes the feeling of a place?

Nothing compares, in my opinion, to pillowy, perfectly cooked fresh tagliatelle… or better yet, fazzoletti.

These squares of fresh pasta turn into blankets of flavor, carrying delicious ingredients into your mouth like a magic carpet.

And perhaps this pasta shape is not for everyone, but for me, in these early days of a so-far rainy summer, I’ve spent my nights laying in bed envisioning myself on the Italian seaside in Luguria - the place where the dish was born.

This dish quells my longing for the feeling of the sun. The bright flavors, warm air & sea-salty wine of the Italian Riviera.

Pre-made, fast cooking fresh lasagna sheets bring this meal together quickly, while still maintaining the feel of restaurant quality. It has BIG flavor (like most of my recipes), and the combination of briney olives & lemon zest bring you straight to the Italian seaside. At least I hope so. Buon’appetito!


Olive & Lemon Fazzoletti (Handkerchief Pasta)

Serves 2-3

  • 6 Rana Lasagne Sheets, 1 package

  • 1 pint container Sungold or orange cherry tomatoes

  • 3-4 finely minced garlic cloves

  • 1/2 cup pitted Italian green olives, preferably Sicilian-style like Castelvetrano

  • 1.5 Tbsp butter

  • 1 whole lemon, washed well for zesting

  • 3 Tbsps fresh ricotta

  • 1.5 Tbsps crushed, diced shelled pistachios

  • Extra virgin olive oil

  • Coarse kosher salt

  • OPTIONAL: red chili flakes for heat

Start a large pot with 2.5 Qt of water to boil, adding 2 Tbsp of salt so that water tastes noticeably salty.

Cut all 6 of the lasagna sheets from the package in half and set aside.

Start by prepping all of your ingredients: finely mince 3-4 garlic cloves. Rinse the entire pint of cherry tomatoes & cut into quarters. Loosely mince olives, until you have about 1/2 cup loosely packed. Loosely chop a handful of shelled pistachios.

To a large flat-bottomed sauté pan, add a big glug of olive oil and place over medium heat. After a minute, add the minced garlic, cooking up to two minutes, until garlic is very fragrant.

Next add all of the cherry tomatoes, cooking down 5-8 minutes until jammy, lowering the heat as needed so as not to burn the garlic.

Finally, add the minced olives and red chili flakes if you want them. Stir to combine. Lower the heat while you prepare the pasta.

Carefully add your half lasagna sheets to the boiling water. Occasionally push the sheets down into the water as they cook because they will want to float to the surface. Let boil about 5-8 minutes or until cooked through (you can cut off a small corner of a sheet to taste).

While the pasta cooks, add three pats of butter, about 1.5 Tbsp, to the pan with the olive & tomato mixture. Add two to three small ladles full of pasta water (don’t add too much liquid!). Stir to combine, creating a silky emulsified sauce.

Taste and salt to taste if needed, but the olives should bring most of the salt and brine.

When the pasta sheets are ready, drop them directly into the pan with the sauce, carefully tossing so as not to break them. If they rip a little, that’s totally okay.

Plate the noodles, spooning extra of the tomato & olive sauce on top. Finish each plate of pasta with a heaping scoop of ricotta, the crushed pistachios and plenty of lemon zest.

Cardamom & Hazelnut Banana Bread

Thank you, Kristen Miglore

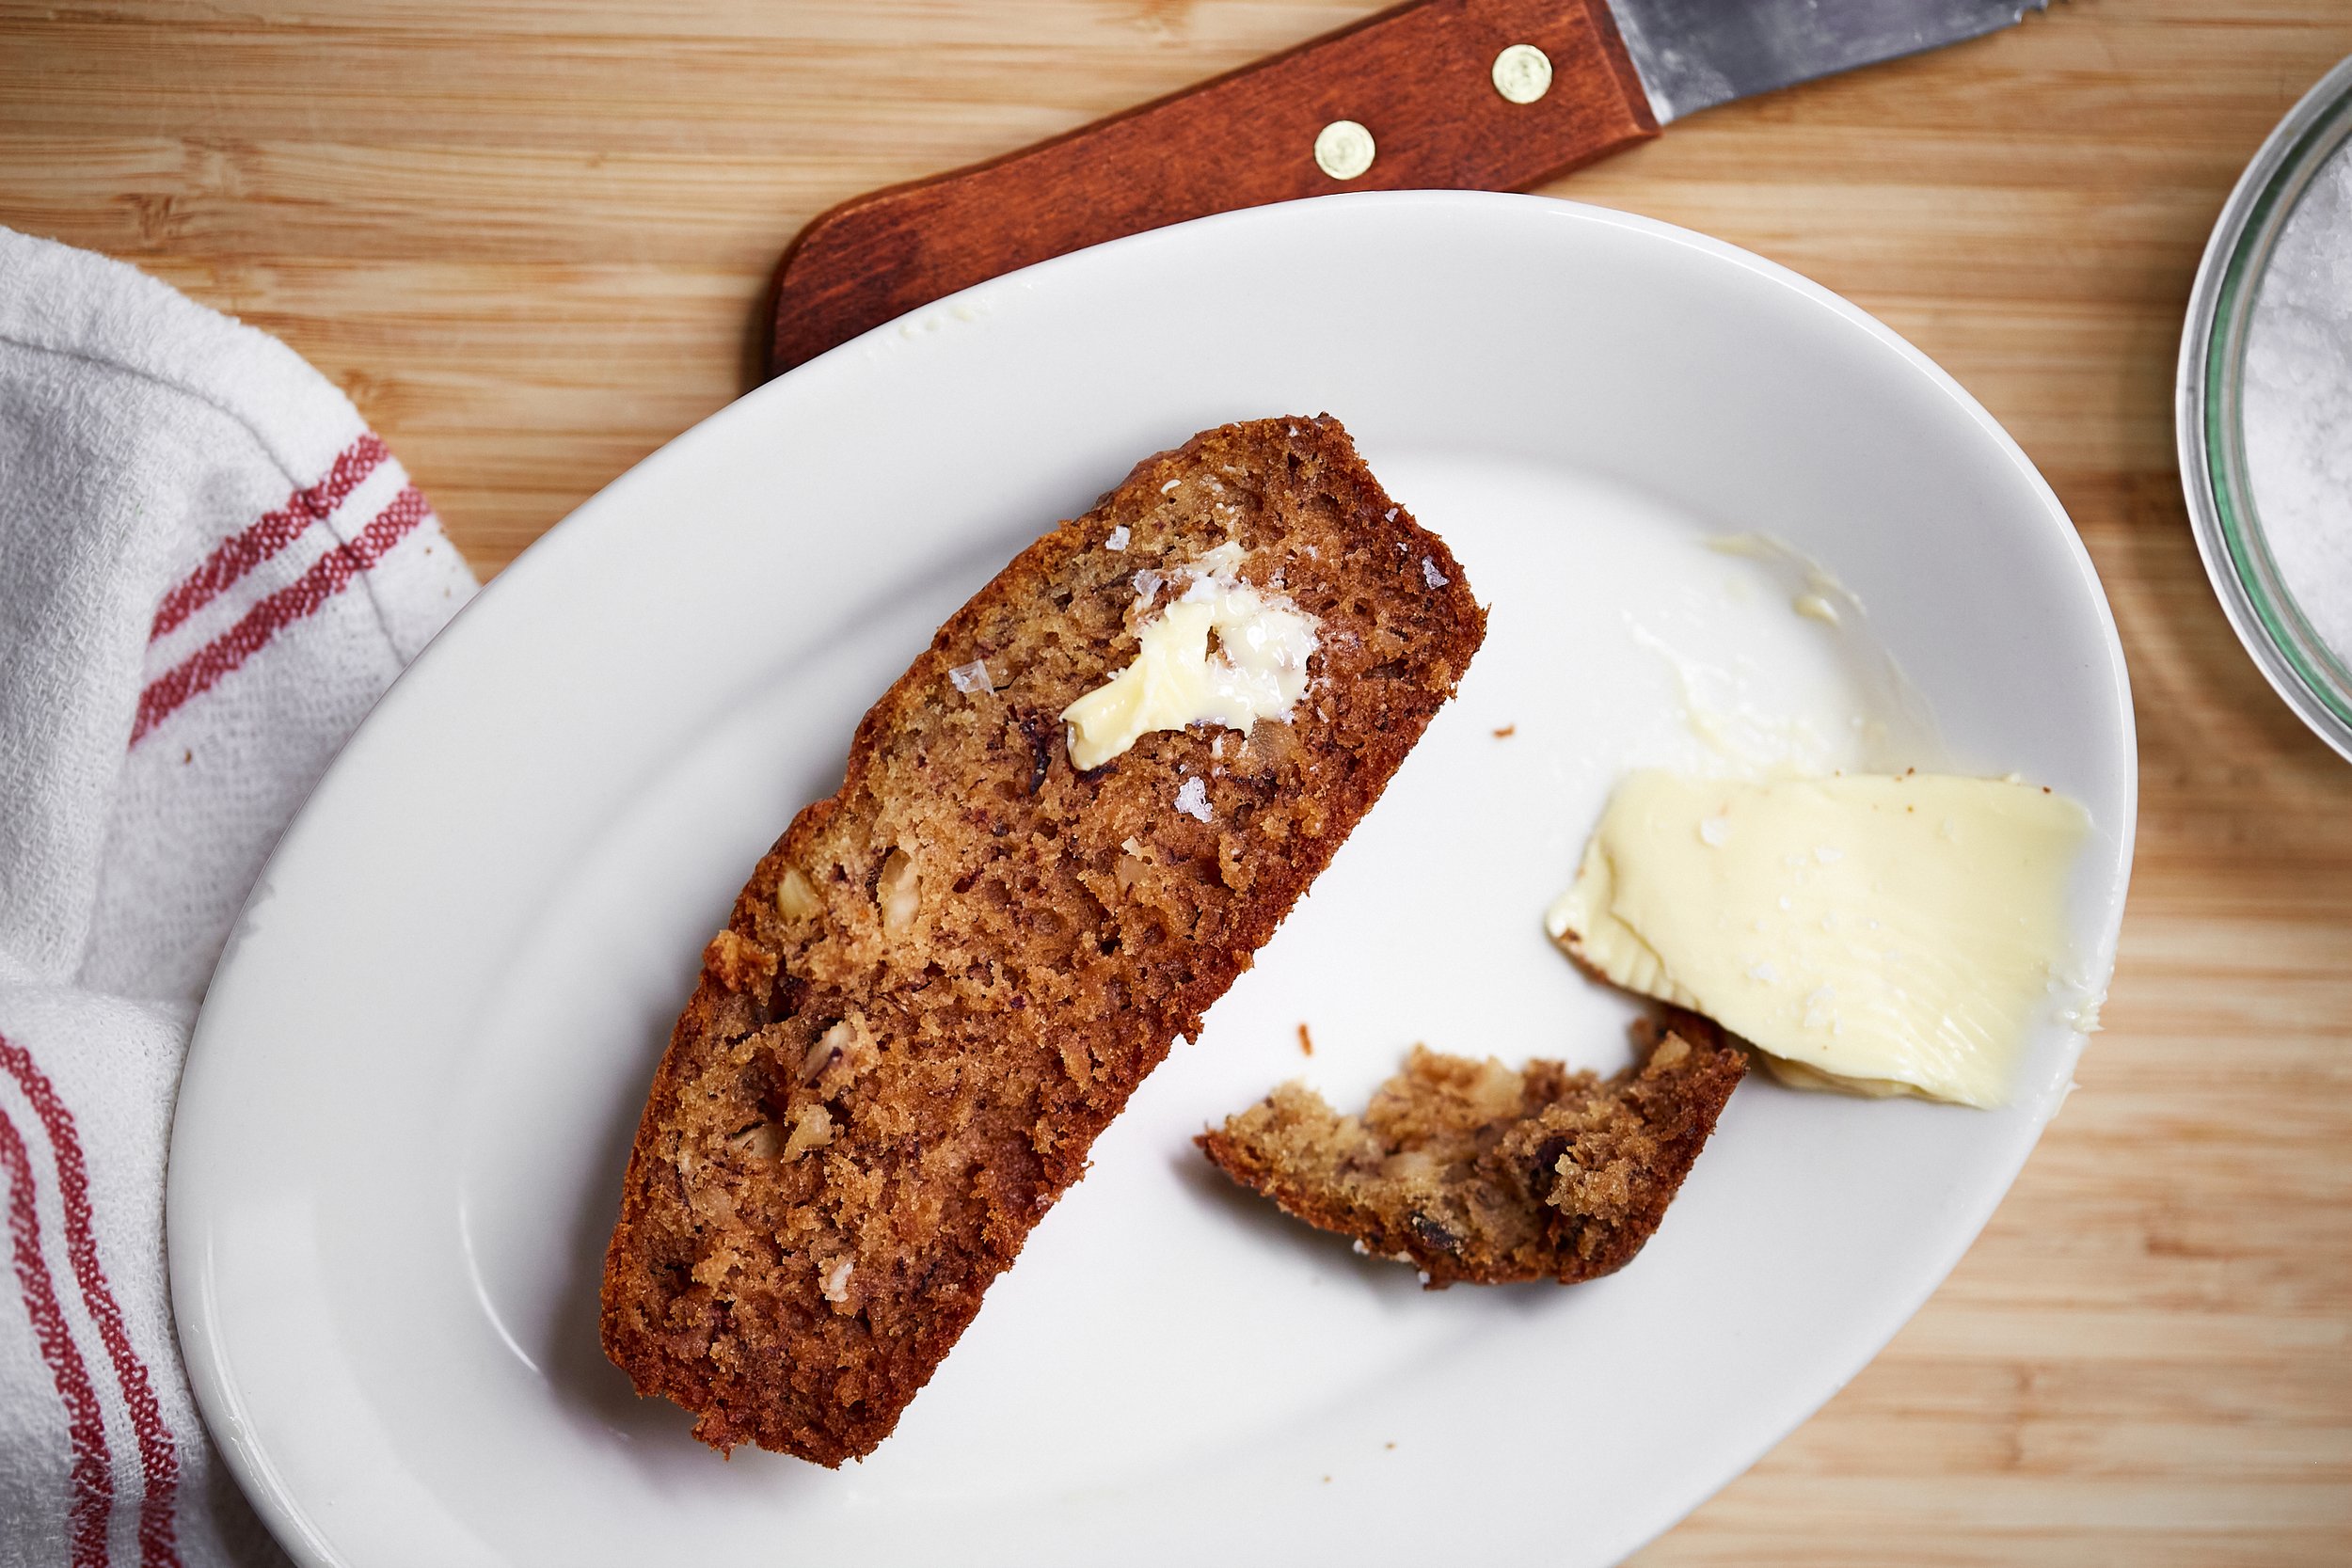
Kristen is a founding editor at Food52. She is also the share-er of my favorite banana bread recipe - a recipe her mom discovered in a community cookbook. As the best recipes are, it seems this one is meant to be passed on and tweaked in all the amazing ways banana bread can be, with a change of nut here, and a dash of something unexpected here.

In this version of Kristen’s banana bread I use hazelnuts and a hint of ground cardamom to make a banana bread that’s just extra-extra special in all the right ways. Of course I hope you will try this recipe, as well as Kristen’s OG version here, which is an undeniably good classic. I’ve also made this using Bob’s Red Mill Gluten Free AP Flour and it came out GREAT.


Cardamom & Hazelnut Banana Bread

Makes one 9”x5” loaf

  • 1/2 cup (226 grams) unsalted butter, melted, plus more for buttering the pans

  • 3 very ripe large bananas (frozen and thawed work great)

  • .87 cups (175 grams) granulated sugar

  • 2 large eggs

  • 1 1/4 cups (157.50 grams) all-purpose flour, or Gluten Free Baking Flour

  • 1/2 teaspoon fine sea salt

  • 1 teaspoon baking soda

  • 1/2 cup (113 grams) finely chopped hazelnuts

  • 1/4-1/2 tsp ground cardamom, depending how much cardamom you want to come through

  • Turbinado or other sugar for sprinkling on top (optional)

Preheat your oven to 350F.

Mash your ripe bananas in a medium sized bowl using a large fork. Once mashed add butter, sugar and eggs. Mix until well-combined.

In another medium sized bowl add your dry ingredients: flour, salt, ground cardamom and baking soda. In lieu of sifting, whisk all the dry ingredients together to make sure there are no lumps, and that they are thoroughly combined.

Add dry ingredients to the bowl with the wet banana mixture. Stir until the flour is nearly all the way combined with the wet ingredients.n Add your chopped hazelnuts and finish stirring until no flour is visible, making sure to scrape down bottom and sides of the bowl.

Butter the sides and bottom of a 9”x5” inch loaf pan. Before putting in the oven, add this special, but optional, touch that I love from Kristen’s recipe - sprinkle the top with a thin layer of turbinado or other raw sugar.

Bake for about 35-45 minutes, until a cake tester, paring knife or toothpick can be inserted into the center and come out with no visibly wet batter (as Kristen says moist crumbs clinging are okay. If you use a shallower pan, bake for less time.

Once removed from the oven, let the loaf cool, 15-30 minutes, then unmold and wrap tightly in parchment and then a layer of tin foil or beeswax food wrap. Keep covered at room temperature.

Tangy Carrot Salsa

Fight the battle against carrots that are shriveling in your fridge once & for all…

In my series ‘What To Do With the Leftover Sh*t In My Fridge’ I find easy culinary solutions for the pesky ingredients that somehow always find their way to the bottom (or back) of your fridge, only to see the day of light again once they’re past their prime.

This time around, the focus of my efforts was carrots and it took some time before I landed on the thing to save them from imminent death: carrot salsa. You didn’t misunderstand me - this 4 ingredient condiment is the thing you’ll be putting on your fish tacos & salads all summer long.


Tangy Carrot Salsa

  • 1 cup of thin carrot rounds from clean, peeled carrots

  • 1/4 cup diced red onion, large dice

  • 1/2 cup loosely packed cilantro, leaves and stems

  • 3 Tbsps of fresh lime juice, from 2-3 limes

  • Kosher salt

  • OPTIONAL: rounds of hot pepper of choice (jalapeńo, habanero, birds eye chili), Cubed avocado

If you are using carrots that have been lying around in your fridge for a while, you’ll want to revive them first by soaking them for a few minutes in an ice bath comprised of ice and water. This will give them back a bit of the moisture they lost while sitting in your fridge.
Clean and peel the carrots, and then cut into thin rounds (roughly 1/4-1/2 inch thick). A mandolin helps make quick work of this, but if you don’t have one, don’t fret — cut them by hand and don’t worry so much about your knife skills. This is a rough chopped salsa, after all. Do a large dice on a bit of red onion, about 1/4 cup. Finally, if you want a spicy salsa, cut a few rounds of your hot pepper of choice.

In the bowl of a food processor combine all ingredients with your squeezed lime juice. Pulse for about 15-30 seconds, just until you’ve created a rough chop. Don’t go too long or you will puree the mixture!

Empty into a bowl and season, adding a pinch of kosher salt and more lime if you like. You could even add some cubed avocado to this salsa before serving to give it texture and flavor contrast.

Enjoy with any meal you’d normally add salsa to (tacos, nachos, quesadillas, salads, grain bowls, toast, eggs!).


The Easiest Creamy Pinto Beans (Vegan)

Creamy, soft pinto beans are one of my favorite comfort foods…

This is how I make mine using nothing more than a can of beans and two cloves of garlic. They’re amazing on tacos, in my Shiitake Mushroom Burritos or just served as a side with some savory rice.


The Easiest Creamy Pinto Beans (Vegan)

  • 1 can Pinto Beans (I love Brad’s Organic beans)

  • 2 whole cloves fresh garlic, peeled and crushed 

  • 1 Tbsp extra virgin olive oil

  • Pinch kosher salt

To a pot add the entire can of pinto beans, unstrained. Add your 2 peeled & crushed garlic cloves, pinch of salt and extra virgin olive oil.

Bring to a boil. Then lower to a simmer and let cook until some of the excess liquid has cooked off, 15-20 minutes. Stir occasionally to make sure the beans are not burning on the bottom.

Once the liquid has reduced, remove the garlic cloves and use a large spoon or spatula to crush and break up the pinto beans. This helps them to get even more creamy. Continue to cook over a lower heat if you want them even thicker. When they are done cooking, add fresh cilantro and stir. Salt to taste, mix and enjoy!

Chili & Cilantro Fairytale Eggplant w. Labneh

Fairy Tale eggplant are a summer delight.

If you love eggplant but avoid large, globe eggplant, which can be bitter and require time & love to bring out their tender side, then this tiny eggplant cousin is for you.

Tender and easy to cook with a deliciously mild flavor, these eggplant have been coming home with me week after week from the farmer’s market. All they need is a little oil and 3-5 minutes cut side down in a hot cast iron. Slightly larger ones may need another few minutes on the other side, and then they’re ready to be served any way you like. This dish is definitely one where you can flex your creativity and choose your own adventure: I like mine served warm over labneh, with a drizzle of chili oil, one final dash of salt and fresh cilantro.


Chili & Cilantro Fairytale Eggplant with Labneh

Serves 2

  • 10-12 Fairy Tale Eggplant

  • Neutral oil, like Avocado, Safflower or Sunflower

  • Kosher salt

  • Freshly ground black pepper

  • 2-3 heaping spoonfuls labneh

  • Chili oil, like Fly by Jing or Chili Onion Crunch from Trader Joe’s

  • Fresh cilantro or other fresh herb

Heat a well seasoned cast iron over med-high heat.

In the meantime, wash and cut Fairy Tale eggplant in half lengthwise. Drizzle the cut side with neutral oil, sprinkle with salt and freshly ground black pepper.

When the cast iron is hot, place the eggplant cut side down until they’re golden and seared, 3-5 minutes. Larger eggplant may need another few minutes on the other side to become tender throughout. Remove eggplant from the cast iron and let cool a few minutes.

Plate over a few heaping spoonfuls of labneh. Drizzle with your favorite condiment like chili oil or zhug. Finish with fresh cilantro and/or other fresh herbs. Enjoy!

Spicy Burst Cherry Tomato Bucatini w. Corn & Burrata

This pasta is like Aglio e Olio got all dressed up for summer vacation…

I’m a sucker for something sensationally simple: perfectly al dente Bucatini generously bathed in spicy, garlicky corn sautéed in butter and cherry tomatoes burst in a little olive oil.

I know … it’s still August and asking you to turn on your ovens, even if to experience the joy of burst cherry tomatoes, may be pushing it, so do the job in a hot sauté pan if need be.

Give the pasta a little time to soak up the delicious flavors of the sauce and serve this room temperature - it’s seriously delightful and perfect for the last of your summer picnics and BBQ’s. Just make sure the pasta is al dente because no one like Soggy-Noodle-Energy. Serve the burrata right on top, on the side, or forego it if you absolutely insist (dairy free friends, I respect your choices).

 
AM2A7376.JPG
 

Spicy Burst Cherry Tomato Bucatini with Corn and Burrata

Serves 2-3

  • 8 oz dry Perciatelli or Bucatini

  • 1 heaping cup cherry tomatoes, 212g

  • 3 crushed garlic cloves

  • 1/2 tsp kosher salt

  • 3-4 Tbsp EVOO

  • Freshly ground black pepper

  • 1 corn cob, 1 cup of corn kernels, 120g

  • 3 garlic cloves, thinly sliced

  • 1 Tbsp butter

  • 1/8-1/4 cup of thinly sliced hot red chilis

  • 1/4 tsp kosher salt

  • OPTIONAL: fresh basil

Preheat your oven to 375F. If you plan to burst your cherry tomatoes in a hot sauté pan, skip this.

Start by crushing three garlic cloves. Rinse your cherry tomatoes and place in a small baking dish (a sheet pan with high sides works, too). To the cherry tomatoes add your crushed garlic cloves, 1/2 tsp kosher salt, 3-4 Tbsp EVOO and a few cranks of freshly ground black pepper. Place in the oven for 15-20 minutes or until cherry tomatoes have burst.

Start a large pot with 2.5 Qt of water to boil, adding 2 Tbsp of salt so that water tastes noticeably salty. Cook Bucatini or Perciatelli until just al dente.

In the meantime, prepare the corn: remove the husk and silk from your ear of corn and cut in half. Stand each half up on it’s flat, cut side, and using a sharp knife, remove the kernels from the ear. Thinly slice 3 garlic cloves and 1/8-1/4 cup of hot red chilis (depending how much heat you like and how hot your pepper is).

In a small sauté pan, place 1 Tbsp butter over med-high heat, occasionally swirling, until butter is very fragrant but not browning - 2-3 minutes. Add the garlic and chili, allowing to cook for a minute or two, making sure not to burn the garlic. Add the corn and sauté, 5 or so mins, until corn is tender but maintains some bite. Add 1/4 tsp salt, stir and then remove from the heat.

Combine the cooked corn with the cherry tomatoes and mix. Taste and adjust seasoning as needed. Strain the cooked pasta, reserving 1/4 cup of the pasta water. Let the noodles cool a minute or two before adding the mixture of burst cherry tomatoes and sautéed corn to the pasta. If it needs a little more “sauce”, add the pasta water and stir vigorously to combine. Serve room temperature, with a creamy ball of burrata on top, on the side or forego the burrata if cheese ain’t your thing! Hollow noodles aren’t slurp-able, but they’re so fun to eat.

Sweet Summer Corn & Gouda Cornbread

The number one reason I can’t stop making this cornbread?

… the moist pockets of buttery corn & gouda cheese. Corn bread can sometimes be a bit dry, so when writing this recipe I heeded some useful wisdom I stumbled upon while doing research — adding AP flour to cornbread makes it a lot more moist, with a slightly more cake-like consistency.

And yeah, I’m a huge fan: the soft texture makes it a pleasure to eat both warm and cold - right out of the fridge. A perfect way to use up ears of corn that didn’t make it to the grill… or just an excuse to make cornbread? I’ll let you decide.

AM2A7479.JPG

Sweet Summer Corn and Gouda Cornbread

Serves 8+

  • 1 cup all-purpose flour

  • ½ cup Indian Head Yellow Corn Meal

  • 1/3 cup turbinado sugar

  • 1 teaspoon salt

  • 2 ½ teaspoons baking powder

  • ¼ cup +2 tablespoons oil

  • 1/4 cup milk

  • 1/4 cup labne + 1/2 Tbsp milk

  • 2 eggs

  • 1 ear corn, 120g corn kernels

  • 1 Tbsp butter, 13g

  • 1/2 cup Grated gouda + a little extra to melt on top at the end (grate while cheese is cold as gouda is quite soft)

Preheat oven to 375.

Combine dry ingredients (flour, sugar, salt and baking powder) in a mixing bowl. Use a whisk to combine.

Remove husk and silk from your ear of corn and cut in half. Stand each half up on it’s flat, cut side, and using a sharp knife, remove the kernels from the ear. In a small saute pan, place 1 Tbsp butter over med-high heat, occasionally swirling, until butter is very fragrant but not browning - 2-3 minutes. Add the corn and sauté, 5 or so mins, until corn is tender but maintains some bite. Add 1/4 tsp salt, stir and then remove from the heat. Let cool while you combine the wet ingredients.

In a separate mixing bowl, combine oil, eggs, milk and the mixture of 1/4 cup labne + 1/2 Tbsp milk, whisked together to loosen the labne.

Finally, to the wet ingredients add the cooled corn and 1/2 cup of grated gouda.

Using a balloon whisk mix together the wet and dry ingredients until the batter is uniform — it will be slightly lumpy. Avoid over whisking the batter, but scrape down the sides and bottom to make sure there are no dry pockets of flour. Pour the batter into a greased 5” x 9” loaf pan and bake for 30 minutes.

After 30 minutes, remove the cornbread from the oven. Insert a cake tester, skewer or knife and make sure it comes out dry.

Switch the oven to the high broil setting. Grate a little extra gouda cheese on top of the corn bread and place under the broiler to melt the cheese — just 2-3 minutes. Remove from the oven and let come to room temperature. Run a knife around the edge of the loaf pan to loosen, flip to remove and serve warm or refrigerate until you’re ready to enjoy.

Basmati Rice w. Dates, Cardamom & Clove

There are few things more comforting than a great bowl of rice.

This sweet, savory, fragrant basmati rice is no exception. Serve it as a side with just about anything from vegetables to proteins, or add chickpeas and make this the main event, finished with a drizzle of yogurt and Tamarind chutney.

AM2A0235.JPG

Basmati Rice with Dates, Cardamom and Clove

  • 1 cup basmati rice

  • 3-4 dates, pits removed and loosely chopped 

  • 11 whole cloves

  • 2 whole cardamom pods, crushed 

  • 1 Tbsp coconut oil 

In a pot add 1 Tbsp coconut oil, 2 lightly crushed cardamom pods, 11 whole cloves and 3-4 dates chopped into small pieces.

Cook together for a minute or two over medium heat, letting the spices get fragrant. Then add your rice to the pot and stir to combine. After a minute, add 1 3/4 cup water to the pot.

Bring to a boil. Once boiling, lower the heat, cover and simmer for 12-15 minutes, or until cooked (follow directions for the brand of rice you’ve chosen).

Once cooked, remove whole cloves and cardamom pods. Add a pinch of kosher salt, mix and enjoy.

Honey & Za'atar Smokey Roasted Pistachios

Addictive and very snack-able.

These pistachios have found themselves a consistent presence in my fridge. I reach for them as a solo snack, tossed into nearly every salad I make, on top of morning kefir bowls and also crowning a soon-to-arrive recipe for Rose Cardamom Pudding.

 
Micole Rondinone Honey & Za'atar Pistachios
 

Honey & Za'atar Smokey Roasted Pistachios

1 Serving 

  • 1 cup raw shelled pistachios

  • 1/4 tsp smoked paprika

  • 1/2 tsp za’atar

  • Kosher salt

  • Honey

  • OPTIONAL: zest of a clean lime

Preheat your oven to 300 F

Put some parchment down on a half sheet baking tray.

Add 1 cup of raw shelled (or unshelled) pistachios to the parchment. Drizzle with honey and then sprinkle with 1/4 tsp smoked paprika, 1/2 tsp za’atar and a good pinch of kosher salt.

Use a utensil to give the pistachios a mix before flattening them into a single layer.

Place in the oven for 15-20 minutes. They should be fragrant!

You can finish them with a bit of lime zest if you want! Serve immediately warm, or bring to room temperature before storing in the fridge up to 2 weeks.

Date Roasted Carrot Salad w. Burrata, Mint & Chili

I love the transformation of humble ingredients.

Carrots are so simple and a thought I had recently was that I don’t make them enough. Though I occasionally think of baby carrots as a counterpart for hummus, for the most part, right size, whole carrots fall out of my consciousness when it comes time to grocery shopping. I find that, like eggplant or other certain vegetables, the deliciousness of a carrot is all about knowing how to treat it: not well seasoned or well cooked, a carrot would gladly be easily forgotten. So, yes, you are going to be sure to bathe these in a mixture of butter and sweet date (or fig) jam and cook until caramelized and completely melt in your mouth tender. To go the no-food-waste mile, be sure to use some of the carrot stem as a garnish.

 
AM2A8821.jpg
 

Date Roasted Carrot Salad with Burrata, Mint & Chili

Serves 2

  • 7 thin carrots, or cut in half if they are wide, total 8 oz

  • 1.5 Tbsps unsalted butter 

  • 1 Tbsp date jam (or use fig jam)

  • Small bunch of fresh thyme

  • Toasted sunflower seeds

  • 1 ball of burrata 

  • 1/2 small hot red chili, finely sliced

  • Fig balsamic

  • Fresh mint for garnish

  • OPTIONAL; carrot stems very finely minced

  • Kosher salt

  • Freshly ground black pepper

  • Neutral oil

Preheat your oven to 400F. First rinse & scrub your carrots. Trim the carrot stems down so that just a short stem remain. Keep a few of the stems without any of the leaves.

Dry your clean carrots and in a high-heat, oven safe pan (like stainless steel or cast iron), heat a little neutral oil over high heat until hot and just barely smoking. Add the carrots, making sure they can sit in a single layer. You’ll probably need a 8-10 inch pan. Add two pinches of kosher salt and a few cranks of freshly ground black pepper and toss the carrots a bit in the pan. Sear, turning occasionally, 5-7 minutes, until golden brown on all sides.

In the meantime, mix 1.5 Tbsps of melted unsalted butter with 1 Tbsp of date (or fig) jam. Add a pinch of kosher salt and stir well.

When the carrots have a slightly golden hue all over, remove the whole pan from the heat. Set on a cool burner and wait a few minutes to allow the pan to cool slightly.

Using tongs, lift carrots and place your bunch of thyme down in the pan. Place carrots back on top of the thyme, brush evenly with the butter and date (or fig) glaze and then put the pan in the oven 12-15 minutes or until carrots are fork tender all the way through.

While the carrots are in the oven, very, very finely chop a bit of thin, clean carrot stems.

Slice a hot red chili into very thin rounds. When the carrots are ready, carefully remove the pan from the oven. Pull off the bundle of thyme and move carrots to a cutting board.

Cut them on the bias into smaller segments and place into 2 bowls, layering the carrot. Cut burrata open and place a half of burrata in each bowl next to the carrots.

Top with rounds of hot chili, a few small leaves of fresh mint, toasted sunflower seeds a sprinkle of the very finely cut carrot stem.

Cut burrata open, and drizzle with fig balsamic.

Plant Based Roasted Sweet Potato Queso-Style Dip w. Caramelized Onions

Seriously, who doesn’t love a dip?!

I’m obsessed with female owned nut milk brand Three Trees. When I worked with them last year I fell in love with their incredible, creamy milks and instantly knew it would make the perfect base for a plant based dip. I’m also going to recommend some of my favorite tortilla chips from Xochitl for their ratio of thinness to dip-carrying-capacity.

Yes, this is a plant based “queso-style” dip and I put that in quotations in case you’re someone who does not believe in veganizing: I would hate for you to miss out on this dip for that reason. It’s just a great dip trying to be great! Made with simple plants and lots of flavor, we start by roasting the sweet potato and sautéing onions. This may seem like an extra step but don’t skip it, please. The name of the game to great food is LAYERING FLAVOR. When we roast and sauté our ingredients, we impart them with flavor before we’ve even blended and seasoned our dip. You can do this up to 2 days in advance, and then blend up later. Come over and make the recipe with me here!

 
AM2A7775.JPG
 

Plant Based Roasted Sweet Potato Queso-Style Dip with Caramelized Onions

Serves 6-8

  • 2 x medium sweet potatoes, 1 lb total

  • 1 medium yellow or Spanish onion

  • 1 Tbsp unsalted butter

  • 1 small white onion

  • 1/2 tsp cayennne powder

  • 1/2 tsp cumin powder

  • 1/2 tsp smoked paprika

  • 1/2 tsp chili powder

  • 2 cups Three Trees original almond milk

  • 2 Tbsp nutritional yeast

  • 4 Tbsps white wine or apple cider vinegar

  • 2 tsp chipotle Cholula, and more for serving

  • Fresh cilantro

  • 1 lime

  • Kosher salt

  • Coconut oil

  • Olive oil

  • OPTIONAL: 1.5 tsps corn starch for thickening

  • Xochitl Organic Blue Corn Tortilla Chips

Preheat oven to 380F degrees.

Peel and cut sweet potatoes into rounds. Add to a mixing bowl with 1.5 Tbsp coconut oil and a sprinkle of kosher salt. Toss to evenly coat.

Lay sweet potatoes on a baking sheet in a single layer and bake for 30 mins or until golden on both sides, flipping halfway through. When finished, cut rounds down loosely into quarters for easier blending.

In the meantime, let’s make caramelized onions: take your medium yellow or Spanish onion and remove the top and bottom root end so that it’s flat on both ends. Peel off outer skin. Cut onion in half, top to bottom, and then slice into thin, half moons. Add all the onions to a large pan with a splash of olive oil. Cook 15-20 mins over low heat, stirring frequently. If the pan gets dry, add a splash of water and mix. If the onions are cooking too fast and burning, turn the heat down.

When the onions are significantly cooked down, add 1 Tbsp butter to the pan and continue to cook over low heat until they are a deep golden color. Add a sprinkle of kosher salt. Remove from heat and set aside.

In a pot with a splash of olive oil, sauté 1  cup of loosely diced white onion. After a few minutes when the onion has started to soften, add a sprinkle of salt and 1/2 tsp cayenne, cumin powder, smoked paprika and chili powder. Mix and cook together another minute or so.

Then remove from the heat and add sweet potato pieces to the pot along with 2 cups Three Trees almond milk. Blend using a food processor, immersion or standard blender until smooth.

Taste and add a touch more salt if it needs. Also add 2 Tbsp nutritional yeast, 4 Tbsps white wine or apple cider vinegar and 2 tsp chipotle Cholula. Once all blended, place back in the pot and bring to a simmer, mixing frequently so you don’t burn the dip on the bottom of the pan. Once it’s bubbling, add a slurry to the pot to thicken - 1.5 tsps corn starch with 2 tsps water. The heat will activate the starch, thickening the dip, so continue to cook and mix for a minute or two after adding.

Remove from the heat and let cool a few minutes. Top with plenty of fresh cilantro, juice of half a lime, and all of the caramelized onions. You can even add another splash Cholula if you like. Live your best dip life!

Kale Brussels Sprout Salad w. Pecorino & Toasted Nuts

Kale ain’t boring when you coat it with homemade lemon oil and pecorino cheese.

Don’t forget a sprinkling of warm, crunchy toasted pistachios and walnuts. I’ve never written a “Copycat” recipe before, but this salad stuck with me long after I ate it in the backyard of Aurora Bk, paired with a beautiful glass of Italian red wine and surrounded by twinkling lights. We tend to think of salad as a meal suited for summer, but this combination is so comforting and perfectly suited for when you need a dose of greens during chilly winter months.

 
Micole Rondinone Kale Salad
 

Kale Brussels Sprout Salad with Pecorino and Toasted Nuts

Serves 2

Lemon oil 

  • ½ cup extra virgin olive oil

  • ½ large lemon, scrubbed clean and peel removed in strips without any bitter white pith

Salad

  • 5 med Lacinato or Tuscan kale leaves, cleaned and cut into fine strips

  • 5 med Brussels sprouts, rinsed and shaved on a mandolin or finely cut using a sharp knife

  • ¾ cup mix of roasted salted pistachios and raw walnuts

  • ⅔ cup finely grated Pecorino

Dressing

  • 2.5 Tbsps lemon oil

  • 1 tsp fresh squeezed lemon juice

  • Pinch salt

To make your lemon oil, add olive oil and lemon peel to a small saucepan (make sure the lemon peel has no bitter white pith on it as it can make the oil taste bitter as well). Warm over a low-medium heat for about 20 minutes, watching and turning the heat down if necessary to avoid any bubbles from forming in the oil. Then remove from the heat and let steep 10 minutes, or until oil has reached room temperature. Strain through a fine mesh strainer and discard lemon peel. If you make extra oil than you need, store in a dark jar in a cool place.

Next, clean and finely cut your kale, removing the thick middle stem. Roll the leaves together and chiffonade, or cut into fine strips. Similarly, rinse your brussel sprouts and using a mandolin, shave into thin strips or cut using a sharp knife. Add to a bowl and toss with lemon oil, lemon juice and a pinch of salt. Massage the greens and then place in the refrigerator for up to 30 minutes.

Over a medium heat, toast pistachios and walnuts in a dry pan, making sure not to burn, just 3 to 5 minutes, until fragrant. In the meantime, finely grate ⅔ cup pecorino cheese.

Remove greens from the fridge and add toasted nuts and most of the grated cheese. Toss gently with your fingers to mix, and serve with a little extra cheese on top. Serve immediately.

Warm Israeli Couscous Salad w. Roasted Cherry Tomatoes

Israeli couscous is an absolute pleasure to eat.

There’s something inherently comforting about eating a hot bowl of soup on a cold day, and that’s precisely how I feel when I eat this warm Israeli couscous salad.  Also known as pearl couscous, this pasta-like couscous is plump and silky, with more surface area to carry flavor than regular couscous. And lest you be misled by my use of the word ‘salad’, there are no leaves involved. Only gluten-full globes of deliciousness with a mouthfeel I can only describe as delightful.

Micole Rondinone Warm Israeli Couscous Salad

In this dish, simplicity is everything. Cherry tomatoes with sea salt and plenty of good olive oil are roasted until bursting, creating a perfectly subtle sauce right in the bottom of the baking dish. Cooked couscous is folded in and finished with shallots caramelized in chili flakes for a savory, spicy finish.  Not sold yet? You can have this dish cooked and ready to serve in as little as 30 minutes. This is one of those dishes that you are going to want to eat right off the spoon.  Be sure to eat it while it’s still warm so you don’t miss out on the joy of cherry tomatoes bursting unexpectedly in your mouth.

Micole Rondinone Warm Israeli Couscous Salad

Warm Israeli Couscous Salad

Serves 4-6

  • 1 cup Israeli (pearl) couscous (like Brad’s Organic or Trader Joes)

  • 1 box cherry tomatoes

  • 1 large shallot, or 2 small

  • Extra Virgin Olive Oil

  • Dried red pepper flakes

  • Sea Salt

  • OPTIONAL: Manchego, for shaving on top

Preheat oven to 375. Wash tomatoes and put them in a baking dish with high sides. Make sure that the tomatoes are in a single layer. Pour lots of good olive oil on top and sprinkle generously with sea salt. The olive oil should cover the bottom of the baking dish. Combined with the juice from the tomatoes, it will comprise the sauce for your couscous, so don’t hesitate to be a bit heavy handed.

Once the oven is preheated, put the tomatoes in the oven and set a timer for 15 minutes. Now start your couscous in a small pot, and cook according to product specific instructions. For Bob’s Red Mill Pearl Couscous, add 1 ½ cups water to the pot with a sprinkle of sea salt. Bring to a boil and then add 1 cup couscous. Reduce to a simmer and mix before covering. Cook covered until water is absorbed, about 10 or so minutes. Remove from the heat, mix gently, cover and set aside.

While the tomatoes are in the oven, cut 1 large shallot into rounds (or use 2 small shallots). The more caramelized shallots, the merrier! Heat 2 tbsps or so of olive oil in a medium sauté pan over medium heat. Add the shallots when the olive oil starts to shimmer. Turn down the heat and let shallots cook until they are starting to become soft and translucent, about 2 minutes. Add ½ tsp red chili flakes and a sprinkle of sea salt to the pan. Let cook over very low heat another 8-10 mins. When you taste your oil, it should have the heat from the chili flakes. Turn the heat off.

Once the tomatoes have been in the oven 15 minutes, take them out, give them a mix and then stick back in the oven for 10 more minutes, or until tomatoes are very soft with wrinkled skin. Once done, let cool a few minutes and then pour cooked couscous into the baking dish with the cherry tomatoes. Pour in shallots with chili oil and gently fold everything together. Taste for salt and add more as needed.

Serve warm. Top with a bit of shaved manchego for some extra pizzazz. This dish also tastes great after a day or two in the fridge, as the couscous continues to soak up all the delicious flavor.

The Simplest Sauce Ever

I grew up eating this sauce. My mom always made it from scratch, imagining it just a little differently each time. I’d watch while she threw in a bit of this and a bit of that, until it tasted just right. While pasta can provide a canvas of opportunity for creativity, there’s something to be said for taking it back to basics. To this day, the sauce always starts with a few things: whole peeled tomatoes crushed by hand (dangerously threatening any garment of clothes you’re wearing), garlic, olive oil, red pepper flakes and capers. It really is the simplest sauce ever, and rarely disappoints. This is an anti-recipe recipe: there are no measurements, and few specifics. Have fun, trust your intuition and remember, you can make this pasta YOURS: add whatever calls to you.

 
Micole Rondinone Simple Sauce
 

The Simplest Sauce Ever

Serves 3-4

  • 1 can Italian whole peeled tomatoes, crushed by hand (or whole fresh tomatoes, if they are in season)

  • Extra virgin olive oil

  • Salt to taste

  • Fresh chopped garlic

  • Red pepper flakes to taste

  • Capers and a splash of the liquid 

  • OPTIONAL: fresh basil

Start by roughly chopping your garlic cloves. For a whole can of tomatoes, I’d use 2-3 cloves of garlic, but adjust to your own tastes and factor in the size of your garlic cloves.

Start a sauce pan or pot over med heat, adding olive oil once the pan is hot. Next, add your garlic and sauté until fragrant, a minute or so. Then add your crushed whole peeled tomatoes to the pot and stir. Add an extra splash of olive oil, and capers with some of the briny liquid.

Lower the heat and cook the sauce down 15 or so minutes, allowing flavor to deepen. Add salt and red pepper flakes to taste only after reducing. If you have fresh basil, chiffonade and add at the last minute before serving.

Serve over al dente pasta, or use for any dish that calls for a simple tomato sauce (i.e., Lasagna, Eggplant or Chicken Parmesan). If saving to use later, let cool to room temperature before packing up and storing in your fridge or freezer.

Seared Mushrooms w. Creamy Polenta & Miso Garlic Butter

This dish puts umami front and center.

Umami is the king of all flavor profiles. It’s deep and savory and rich. This appetizer, perfect for the holiday season around the corner, uses three umami ingredients in one dish: mushrooms, Parmigiano-Reggiano and miso. Oh, and did I mention butter and garlic? Finish this flavor bomb of a dish with something bright, like fig balsamic or herb oil. Serve alongside simple proteins and/or plants. Eat the whole cozy bowl yourself, or divvy it up with those whom you can safely gather with.

 
Micole Rondinone Seared Mushrooms
 

Seared Mushrooms with Creamy Polenta and Miso Garlic Butter

For Polenta (serves 2 with leftovers)

  • ½ cup white polenta (southern white grits)

  • ¼ tsp coarse salt

  • 1 cup milk

  • 1 cup water

  • ½ cup freshly grated Parmigiano Reggiano

  • Freshly ground black pepper

  • Finish with salt to taste (plan to under salt this a little because the mushrooms and miso butter have lots of flavor)

For Mushrooms (serves 2)

  • 1 portobello, 2 shiitake and 40g beech mushrooms per serving, or 1/2 cup

  • Neutral oil, enough to coat the bottom of your pan

  • Coarse salt

  • Garlic powder

  • 20g butter, or 1.5 Tbsps, melted

  • 4 smashed garlic cloves

  • ½ Tbsp miso


First, make your creamy polenta: to a pot, add the milk, water and salt. Bring to a boil, then add polenta and lower the heat, cooking until liquid is absorbed, stirring frequently. When polenta is creamy, about 15 minutes, add black pepper, grated parmigiano reggiano and salt to taste. Make sure to under salt the polenta a bit because the miso butter is salty and the mushrooms should also be well seasoned. Remove from the heat off and set to the side, covered.

Clean and dry your mushrooms well. In a frying pan, heat enough neutral oil to coat the bottom of the pan. Drizzle just a little oil on the mushrooms, so your seasoning sticks, and sprinkle with coarse salt and garlic powder on both sides. When the neutral oil is shimmering and pan is hot, sear all the mushrooms on both sides, in batches if necessary to avoid overcrowding. Set mushrooms aside. Safely remove the hot oil and liquid from the pan. Wipe clean and place back over a low heat.

At this point, give your polenta a stir and put back over a low heat, covered, to warm for serving.

In your clean pan, add melted butter, miso and garlic. Over a low-medium heat, whisk to combine butter with the miso. Once incorporated, add the mushrooms to the pan, spooning the miso butter over them.

After a minute or so turn the heat off on both the mushrooms and polenta. Add polenta to a shallow bowl. Using a slotted spoon, remove mushrooms from the pan and place on top. Spoon miso butter over the mushrooms. Serve immediately with a fork and knife. Finish with something bright, like a drizzle of herb oil or fruity balsamic vinegar (I love fig balsamic, personally).

Low & Slow Goat Cheese Eggs

I’m not sure what’s worse than dry scrambled eggs.

I make very few exceptions in regards to my distaste for scrambled eggs and largely because they are often overcooked, becoming rubbery chunks I simply do not find appealing. Two notable exceptions however are 1) Australian Folded Eggs, gifted to my consciousness via The Kitchn and 2) Bobby Flay’s eggs at his now closed New York restaurant, Gato. Although these two dishes are made using differing techniques, what they share is the resulting soft, custardy deliciousness that can be scrambled eggs, when cooked the right way.

Borrowing from Gato’s addition of creme fraiche, goat cheese is mixed into these eggs before they’ve started to cook, and going slow allows you to make sure the eggs come off the heat just when they’ve transformed from raw to deliciously custardy.

 
AM2A6391.jpg
 

Low & Slow Goat Cheese Eggs

  • 4 eggs

  • 1.5- 2 Tbsps Soft Goat Cheese, preferably from a log and not precrumbled

  • Freshly ground black pepper

  • Butter or Extra virgin olive oil

  • Sea Salt

  • OPTIONAL: sprinkle eggs with your favorite finishers, I like chives and aleppo pepper

Take goat cheese out to bring to room temp.

Whisk 4 eggs together with a few cranks of freshly ground pepper and about ¼ tsp of sea salt.

Over low heat - start a non stick pan with a little pat of butter, or olive oil.

Once butter has melted or oil is warm, add eggs. The pan shouldn’t be so hot that the eggs start cooking when they hit the pan. Add about 1.5-2 Tsps softened, crumbled goat cheese.

With a spatula, start gently mixing the eggs in the pan. The idea is to create folds of softly cooked egg. Continue folding in a circular manner until the eggs are gently cooked with creamy layers in between. Put into a bowl and top with fresh chives and any of your other favorite toppings.