Green Pasta w. Citrus Panko "Grattato"

Who doesn’t love a 2-for-1 jackpot?

Yes, this pasta sauce is a perfect way to use up the greens you forgot about in the bottom drawer. But, the magic is you get to walk away with dinner done AND a snackable spinach dip — ready to go for your nibbling pleasure — that comes together in about 30 seconds from the remnants of your sauce. You should know, too, that this recipe has a special place in my heart; an ode to the very first recipe I ever wrote back in 2017. This dish is steeped in personal history, and I hope it feels like a warm hug of gratitude when it reaches you.


Green Pasta with Citrus Panko "Grattato"

Serves 2-3

  • ½ 9 oz bag raw spinach, 4-5 oz

  • 1 small bunch raw kale, 6-7 leaves

  • 2 Tbsps of cottage cheese, or vegan alternative 

  • 1 heaping Tbsp goat cheese, or vegan alternative

  • ½ anchovy fillet

  • 4-5 scallion ends, or 1-2 cloves garlic

  • 1 whole lemon

  • 10 - 12 oz Pipette

  • Grated fresh pecorino, or parmesan  

  • Kosher salt, to taste

  • Olive oil

Optional, Panko Grattato:

  • 2-3 Tbsps olive oil, butter or vegan alternative

  • ½ - ¾ cup panko

  • 2 garlic cloves, grated

  • Pinch of chili flakes

Pan Grattato Instructions

If you plan to make the breadcrumbs (which are optional but SO good & easy), to a pan add 3 Tbsps EVOO & 2 cloves grated garlic. Place over low heat just until garlic is fragrant, 1 minute. Add ½ - ¾ cup panko. Turn up heat and stir constantly, until panko is browned all over. Remove from heat & add salt & chili flakes, to taste.

Sauce Instructions

Start a large pot, 3-4 quarts of water, over a high heat to boil. Wash spinach & kale, if needed. Remove kale leaves from tough stem.

When water boils, add 2 tsps salt. To boiling water, add kale and using tongs or a large spoon, press down to submerge. After 1 minute, add spinach and submerge. After another minute, do not drain pot into the sink — remove spinach from the boiling water using a slotted spoon, tongs or spider strainer, placing blanched greens directly into a blender or food processor.

When all greens are removed from the boiling water, immediately add 10-12 oz pipette, cooking 7-8 minutes until al dente, or follow package instructions for the pasta you’re making.

To the blender with the greens, add 1.5 Tbsps EVOO, 2 Tbsps Cottage Cheese, 1 Tbsp goat cheese, ½ anchovy fillet (more if you like anchovy), 5-6 scallion ends (1-2 garlic cloves if you don’t have). When the pasta is almost done, add 2-3 large spoonfuls of pasta into the blender, along with juice of ½ a lemon and blend until smooth. Salt to taste.

Strain cooked pasta & place back into the empty pot. Place the strainer over the pot & pour about half of the blended sauce into the strainer. Using the back of a large spoon, press down until all the liquid has been strained into the pasta. Set aside what remains of the “pulp” from the cooked greens.

Add the remaining blended sauce to the pasta, top with fresh pecorino, lemon zest, plus panko grattato if you opted to make it.

BONUS DISH: Take what remains of your “pulp” from the cooked greens, add 3-4 Tbsps sour cream, cottage cheese, plain yogurt, labne or vegan alternative. Mix, salt to taste and serve as a take on spinach dip!

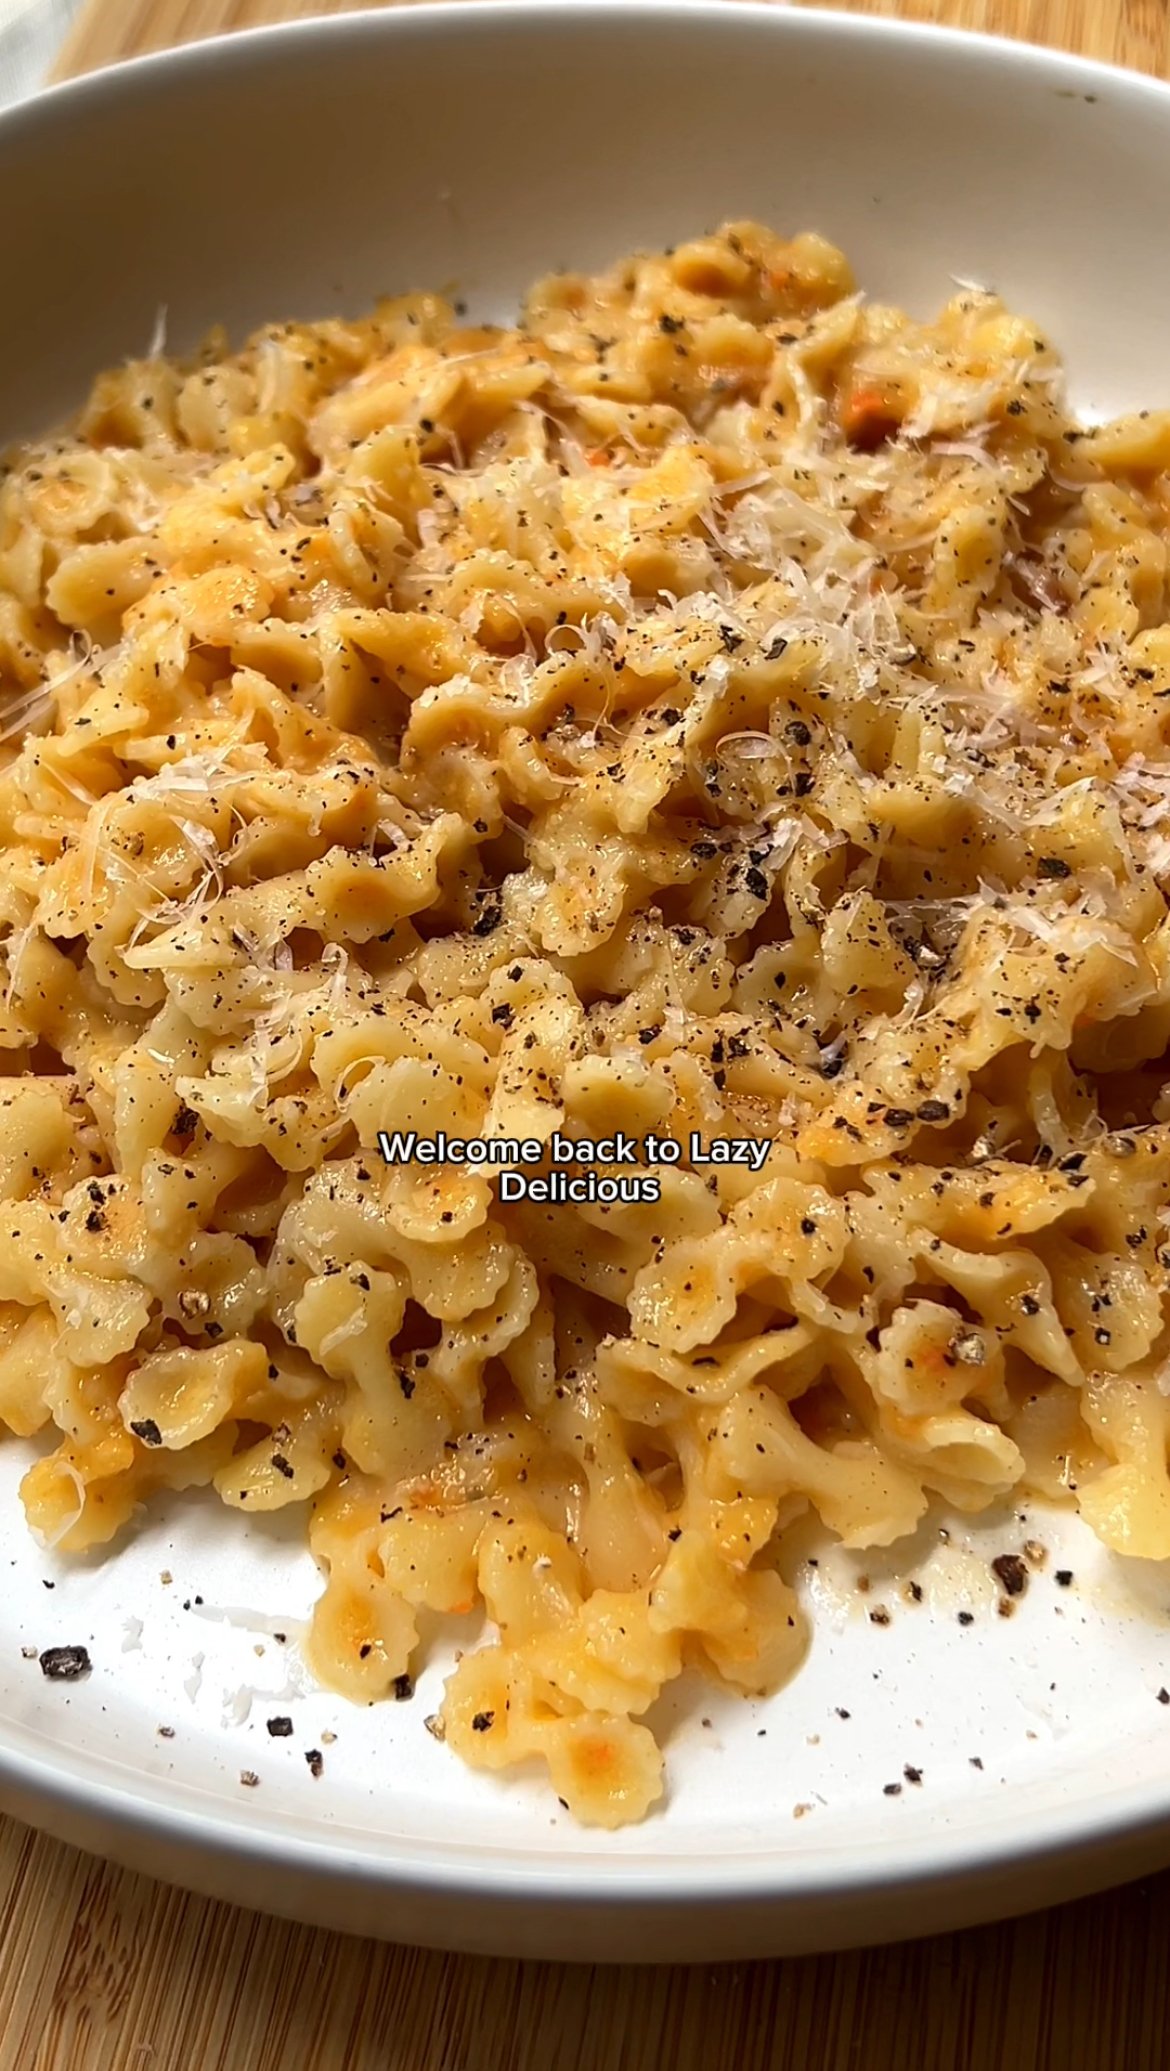
Farfalline in Carrot Miso Sauce

This 7-ingredient recipe (okay, 8!), is hygge for your tastebuds.

It's an umami, veg-packed farfelline that is like a cozy middle ground between soup and pasta. And it's a perfect opportunity to use up carrots that spent a few days too many in the bottom drawer. Trust me when I say, you need to make this.


Farfalline in Carrot Miso Sauce

Serves 2

  • 1 small bunch tri-color carrots, like Cal-Organic

  • 1/4 cup broth (veg, bone, chicken — any kind works), adding more as needed

  • 2 whole garlic cloves

  • 2 Tbsps Shiro Miso, or other miso paste

  • 1-2 Tbsps Butter or vegan alternative

  • Parmigiano-Reggiano or vegan alternative like nutritional yeast

  • 1 cup Farfelline

  • Freshly ground black pepper

  • Kosher salt, to taste

Preheat your oven to 400F and start a pot of water to boil for your pasta.

Rinse + peel your carrots and place on a baking sheet.

Then in the microwave, melt 1 Tbsp of butter or vegan alternative. To your warm butter, mix in 2 Tbsps of Shiro miso, or other miso paste.

Coat your carrots evenly all over with your butter and miso marinade, then top with 1-2 whole crushed garlic cloves. Roast carrots in the oven until carrots are tender all the way through, 10-20 minutes or more, depending on the thickness of your carrots.

Place roasted carrots and whole garlic in a blender or food processor along with 1/4 cup of broth and blend until smooth.

Salt your boiling pasta water, add farfalline and cook until al-dente, 5-6 minutes. In the meantime, add 2-3 spoonfuls of your starchy pasta water to the blended carrot sauce, along with 1/2 cup of loosely packed, freshly grated parmigiano-reggiano or vegan alternative, like nutritional yeast.

Blend to combine, taste and add salt, only if needed.

To your cooked, strained pasta, mix in another Tbsp of butter along with another 1/4-1/2 cup freshly grated parmigiano-reggiano (or vegan alt), lots of freshly ground black pepper and your carrot sauce.

Adjust the thickness of your sauce by adding more bone broth as needed. Finish with cheese and pep, and enjoy!

Olive & Lemon Fazzoletti (Handkerchief Pasta)

Hear me out. Have you ever craved a food that evokes the feeling of a place?

Nothing compares, in my opinion, to pillowy, perfectly cooked fresh tagliatelle… or better yet, fazzoletti.

These squares of fresh pasta turn into blankets of flavor, carrying delicious ingredients into your mouth like a magic carpet.

And perhaps this pasta shape is not for everyone, but for me, in these early days of a so-far rainy summer, I’ve spent my nights laying in bed envisioning myself on the Italian seaside in Luguria - the place where the dish was born.

This dish quells my longing for the feeling of the sun. The bright flavors, warm air & sea-salty wine of the Italian Riviera.

Pre-made, fast cooking fresh lasagna sheets bring this meal together quickly, while still maintaining the feel of restaurant quality. It has BIG flavor (like most of my recipes), and the combination of briney olives & lemon zest bring you straight to the Italian seaside. At least I hope so. Buon’appetito!


Olive & Lemon Fazzoletti (Handkerchief Pasta)

Serves 2-3

  • 6 Rana Lasagne Sheets, 1 package

  • 1 pint container Sungold or orange cherry tomatoes

  • 3-4 finely minced garlic cloves

  • 1/2 cup pitted Italian green olives, preferably Sicilian-style like Castelvetrano

  • 1.5 Tbsp butter

  • 1 whole lemon, washed well for zesting

  • 3 Tbsps fresh ricotta

  • 1.5 Tbsps crushed, diced shelled pistachios

  • Extra virgin olive oil

  • Coarse kosher salt

  • OPTIONAL: red chili flakes for heat

Start a large pot with 2.5 Qt of water to boil, adding 2 Tbsp of salt so that water tastes noticeably salty.

Cut all 6 of the lasagna sheets from the package in half and set aside.

Start by prepping all of your ingredients: finely mince 3-4 garlic cloves. Rinse the entire pint of cherry tomatoes & cut into quarters. Loosely mince olives, until you have about 1/2 cup loosely packed. Loosely chop a handful of shelled pistachios.

To a large flat-bottomed sauté pan, add a big glug of olive oil and place over medium heat. After a minute, add the minced garlic, cooking up to two minutes, until garlic is very fragrant.

Next add all of the cherry tomatoes, cooking down 5-8 minutes until jammy, lowering the heat as needed so as not to burn the garlic.

Finally, add the minced olives and red chili flakes if you want them. Stir to combine. Lower the heat while you prepare the pasta.

Carefully add your half lasagna sheets to the boiling water. Occasionally push the sheets down into the water as they cook because they will want to float to the surface. Let boil about 5-8 minutes or until cooked through (you can cut off a small corner of a sheet to taste).

While the pasta cooks, add three pats of butter, about 1.5 Tbsp, to the pan with the olive & tomato mixture. Add two to three small ladles full of pasta water (don’t add too much liquid!). Stir to combine, creating a silky emulsified sauce.

Taste and salt to taste if needed, but the olives should bring most of the salt and brine.

When the pasta sheets are ready, drop them directly into the pan with the sauce, carefully tossing so as not to break them. If they rip a little, that’s totally okay.

Plate the noodles, spooning extra of the tomato & olive sauce on top. Finish each plate of pasta with a heaping scoop of ricotta, the crushed pistachios and plenty of lemon zest.

Tangy Carrot Salsa

Fight the battle against carrots that are shriveling in your fridge once & for all…

In my series ‘What To Do With the Leftover Sh*t In My Fridge’ I find easy culinary solutions for the pesky ingredients that somehow always find their way to the bottom (or back) of your fridge, only to see the day of light again once they’re past their prime.

This time around, the focus of my efforts was carrots and it took some time before I landed on the thing to save them from imminent death: carrot salsa. You didn’t misunderstand me - this 4 ingredient condiment is the thing you’ll be putting on your fish tacos & salads all summer long.


Tangy Carrot Salsa

  • 1 cup of thin carrot rounds from clean, peeled carrots

  • 1/4 cup diced red onion, large dice

  • 1/2 cup loosely packed cilantro, leaves and stems

  • 3 Tbsps of fresh lime juice, from 2-3 limes

  • Kosher salt

  • OPTIONAL: rounds of hot pepper of choice (jalapeńo, habanero, birds eye chili), Cubed avocado

If you are using carrots that have been lying around in your fridge for a while, you’ll want to revive them first by soaking them for a few minutes in an ice bath comprised of ice and water. This will give them back a bit of the moisture they lost while sitting in your fridge.
Clean and peel the carrots, and then cut into thin rounds (roughly 1/4-1/2 inch thick). A mandolin helps make quick work of this, but if you don’t have one, don’t fret — cut them by hand and don’t worry so much about your knife skills. This is a rough chopped salsa, after all. Do a large dice on a bit of red onion, about 1/4 cup. Finally, if you want a spicy salsa, cut a few rounds of your hot pepper of choice.

In the bowl of a food processor combine all ingredients with your squeezed lime juice. Pulse for about 15-30 seconds, just until you’ve created a rough chop. Don’t go too long or you will puree the mixture!

Empty into a bowl and season, adding a pinch of kosher salt and more lime if you like. You could even add some cubed avocado to this salsa before serving to give it texture and flavor contrast.

Enjoy with any meal you’d normally add salsa to (tacos, nachos, quesadillas, salads, grain bowls, toast, eggs!).


Spicy Burst Cherry Tomato Bucatini w. Corn & Burrata

This pasta is like Aglio e Olio got all dressed up for summer vacation…

I’m a sucker for something sensationally simple: perfectly al dente Bucatini generously bathed in spicy, garlicky corn sautéed in butter and cherry tomatoes burst in a little olive oil.

I know … it’s still August and asking you to turn on your ovens, even if to experience the joy of burst cherry tomatoes, may be pushing it, so do the job in a hot sauté pan if need be.

Give the pasta a little time to soak up the delicious flavors of the sauce and serve this room temperature - it’s seriously delightful and perfect for the last of your summer picnics and BBQ’s. Just make sure the pasta is al dente because no one like Soggy-Noodle-Energy. Serve the burrata right on top, on the side, or forego it if you absolutely insist (dairy free friends, I respect your choices).

 
AM2A7376.JPG
 

Spicy Burst Cherry Tomato Bucatini with Corn and Burrata

Serves 2-3

  • 8 oz dry Perciatelli or Bucatini

  • 1 heaping cup cherry tomatoes, 212g

  • 3 crushed garlic cloves

  • 1/2 tsp kosher salt

  • 3-4 Tbsp EVOO

  • Freshly ground black pepper

  • 1 corn cob, 1 cup of corn kernels, 120g

  • 3 garlic cloves, thinly sliced

  • 1 Tbsp butter

  • 1/8-1/4 cup of thinly sliced hot red chilis

  • 1/4 tsp kosher salt

  • OPTIONAL: fresh basil

Preheat your oven to 375F. If you plan to burst your cherry tomatoes in a hot sauté pan, skip this.

Start by crushing three garlic cloves. Rinse your cherry tomatoes and place in a small baking dish (a sheet pan with high sides works, too). To the cherry tomatoes add your crushed garlic cloves, 1/2 tsp kosher salt, 3-4 Tbsp EVOO and a few cranks of freshly ground black pepper. Place in the oven for 15-20 minutes or until cherry tomatoes have burst.

Start a large pot with 2.5 Qt of water to boil, adding 2 Tbsp of salt so that water tastes noticeably salty. Cook Bucatini or Perciatelli until just al dente.

In the meantime, prepare the corn: remove the husk and silk from your ear of corn and cut in half. Stand each half up on it’s flat, cut side, and using a sharp knife, remove the kernels from the ear. Thinly slice 3 garlic cloves and 1/8-1/4 cup of hot red chilis (depending how much heat you like and how hot your pepper is).

In a small sauté pan, place 1 Tbsp butter over med-high heat, occasionally swirling, until butter is very fragrant but not browning - 2-3 minutes. Add the garlic and chili, allowing to cook for a minute or two, making sure not to burn the garlic. Add the corn and sauté, 5 or so mins, until corn is tender but maintains some bite. Add 1/4 tsp salt, stir and then remove from the heat.

Combine the cooked corn with the cherry tomatoes and mix. Taste and adjust seasoning as needed. Strain the cooked pasta, reserving 1/4 cup of the pasta water. Let the noodles cool a minute or two before adding the mixture of burst cherry tomatoes and sautéed corn to the pasta. If it needs a little more “sauce”, add the pasta water and stir vigorously to combine. Serve room temperature, with a creamy ball of burrata on top, on the side or forego the burrata if cheese ain’t your thing! Hollow noodles aren’t slurp-able, but they’re so fun to eat.

Maple Citrus Plum Jam w. Ginger

Tangy, seasonal & sweet…

This plum jam recipe was born out of a collaboration with Fraiche Kiosk for their 2021 Seasonal Fruits & Vegetables Calendar. In July, plums are exquisite and now is the time to take advantage, so go on — get jammin’ [was that a dad joke?].

Print and digital copies of the Seasonal Calendar are still available here! 10% of proceeds from sales are donated to Rethink Food, a nonprofit working to reduce food insecurity in the New York area. Each month features seasonal ingredients, monthly recipes (including mine!) & Fraîche’s suggestions for a more environmentally friendly life.

AM2A2596.JPG

Maple Citrus Plum Jam with Ginger

  • 2 lbs ripe plums, Empress or other variety

  • ½ cup of maple sugar, or natural sweetener of your choice

  • ½ cup water

  • Juice of ½ - 1 whole lemon or lime, to taste

  • ½ - 1 tsp raw grated ginger, to taste

Thoroughly rinse your plums, then cut in half and remove pits. Make sure there are no small pieces stuck to the plum flesh. Cut plum halves into quarters and add to a med-large sauce pot. Add water and sugar or other sweetener to the plums, and mix. Start the mixture over a medium heat. When it starts to simmer, turn down to a low heat and cook, stirring very often to make sure the sugars don’t burn on the bottom of the pot.

Cook about 45 minutes - 1 hour, or longer, until jam has reached desired thick consistency. Test thickness using an ice cold spoon from the freezer — when the jam sets on the cold spoon it reflects how thick the jam will be once cooled. At this point add fresh squeeze citrus juice , strained of any solids, and raw grated ginger to taste. Mix thoroughly. Let cool before storing in a jar in the fridge.


Plant Based Roasted Sweet Potato Queso-Style Dip w. Caramelized Onions

Seriously, who doesn’t love a dip?!

I’m obsessed with female owned nut milk brand Three Trees. When I worked with them last year I fell in love with their incredible, creamy milks and instantly knew it would make the perfect base for a plant based dip. I’m also going to recommend some of my favorite tortilla chips from Xochitl for their ratio of thinness to dip-carrying-capacity.

Yes, this is a plant based “queso-style” dip and I put that in quotations in case you’re someone who does not believe in veganizing: I would hate for you to miss out on this dip for that reason. It’s just a great dip trying to be great! Made with simple plants and lots of flavor, we start by roasting the sweet potato and sautéing onions. This may seem like an extra step but don’t skip it, please. The name of the game to great food is LAYERING FLAVOR. When we roast and sauté our ingredients, we impart them with flavor before we’ve even blended and seasoned our dip. You can do this up to 2 days in advance, and then blend up later. Come over and make the recipe with me here!

 
AM2A7775.JPG
 

Plant Based Roasted Sweet Potato Queso-Style Dip with Caramelized Onions

Serves 6-8

  • 2 x medium sweet potatoes, 1 lb total

  • 1 medium yellow or Spanish onion

  • 1 Tbsp unsalted butter

  • 1 small white onion

  • 1/2 tsp cayennne powder

  • 1/2 tsp cumin powder

  • 1/2 tsp smoked paprika

  • 1/2 tsp chili powder

  • 2 cups Three Trees original almond milk

  • 2 Tbsp nutritional yeast

  • 4 Tbsps white wine or apple cider vinegar

  • 2 tsp chipotle Cholula, and more for serving

  • Fresh cilantro

  • 1 lime

  • Kosher salt

  • Coconut oil

  • Olive oil

  • OPTIONAL: 1.5 tsps corn starch for thickening

  • Xochitl Organic Blue Corn Tortilla Chips

Preheat oven to 380F degrees.

Peel and cut sweet potatoes into rounds. Add to a mixing bowl with 1.5 Tbsp coconut oil and a sprinkle of kosher salt. Toss to evenly coat.

Lay sweet potatoes on a baking sheet in a single layer and bake for 30 mins or until golden on both sides, flipping halfway through. When finished, cut rounds down loosely into quarters for easier blending.

In the meantime, let’s make caramelized onions: take your medium yellow or Spanish onion and remove the top and bottom root end so that it’s flat on both ends. Peel off outer skin. Cut onion in half, top to bottom, and then slice into thin, half moons. Add all the onions to a large pan with a splash of olive oil. Cook 15-20 mins over low heat, stirring frequently. If the pan gets dry, add a splash of water and mix. If the onions are cooking too fast and burning, turn the heat down.

When the onions are significantly cooked down, add 1 Tbsp butter to the pan and continue to cook over low heat until they are a deep golden color. Add a sprinkle of kosher salt. Remove from heat and set aside.

In a pot with a splash of olive oil, sauté 1  cup of loosely diced white onion. After a few minutes when the onion has started to soften, add a sprinkle of salt and 1/2 tsp cayenne, cumin powder, smoked paprika and chili powder. Mix and cook together another minute or so.

Then remove from the heat and add sweet potato pieces to the pot along with 2 cups Three Trees almond milk. Blend using a food processor, immersion or standard blender until smooth.

Taste and add a touch more salt if it needs. Also add 2 Tbsp nutritional yeast, 4 Tbsps white wine or apple cider vinegar and 2 tsp chipotle Cholula. Once all blended, place back in the pot and bring to a simmer, mixing frequently so you don’t burn the dip on the bottom of the pan. Once it’s bubbling, add a slurry to the pot to thicken - 1.5 tsps corn starch with 2 tsps water. The heat will activate the starch, thickening the dip, so continue to cook and mix for a minute or two after adding.

Remove from the heat and let cool a few minutes. Top with plenty of fresh cilantro, juice of half a lime, and all of the caramelized onions. You can even add another splash Cholula if you like. Live your best dip life!

The Simplest Sauce Ever

I grew up eating this sauce. My mom always made it from scratch, imagining it just a little differently each time. I’d watch while she threw in a bit of this and a bit of that, until it tasted just right. While pasta can provide a canvas of opportunity for creativity, there’s something to be said for taking it back to basics. To this day, the sauce always starts with a few things: whole peeled tomatoes crushed by hand (dangerously threatening any garment of clothes you’re wearing), garlic, olive oil, red pepper flakes and capers. It really is the simplest sauce ever, and rarely disappoints. This is an anti-recipe recipe: there are no measurements, and few specifics. Have fun, trust your intuition and remember, you can make this pasta YOURS: add whatever calls to you.

 
Micole Rondinone Simple Sauce
 

The Simplest Sauce Ever

Serves 3-4

  • 1 can Italian whole peeled tomatoes, crushed by hand (or whole fresh tomatoes, if they are in season)

  • Extra virgin olive oil

  • Salt to taste

  • Fresh chopped garlic

  • Red pepper flakes to taste

  • Capers and a splash of the liquid 

  • OPTIONAL: fresh basil

Start by roughly chopping your garlic cloves. For a whole can of tomatoes, I’d use 2-3 cloves of garlic, but adjust to your own tastes and factor in the size of your garlic cloves.

Start a sauce pan or pot over med heat, adding olive oil once the pan is hot. Next, add your garlic and sauté until fragrant, a minute or so. Then add your crushed whole peeled tomatoes to the pot and stir. Add an extra splash of olive oil, and capers with some of the briny liquid.

Lower the heat and cook the sauce down 15 or so minutes, allowing flavor to deepen. Add salt and red pepper flakes to taste only after reducing. If you have fresh basil, chiffonade and add at the last minute before serving.

Serve over al dente pasta, or use for any dish that calls for a simple tomato sauce (i.e., Lasagna, Eggplant or Chicken Parmesan). If saving to use later, let cool to room temperature before packing up and storing in your fridge or freezer.

Pistachio Pesto

Pesto is a thing of magic.

From the Italian “pestare”, or to crush, pesto starts out as 6 simple ingredients and turns into a bright, rich, savory sauce that can serve you on your culinary adventures in myriad ways.  Pesto can be used, of course, on pasta, but also as a marinade for meat, in dressings, as the base for a delicious pizza, spread on to your favorite sandwich, on top of homemade hummus, or, as I love to do when I make my Pesto Meatballs, folded into ground beef. 

Micole Rondinone Pesto Pistachio

Much like other sauces with minimal ingredients (Carbonara and Cacio e Pepe come to mind), the quality of each ingredient is of the utmost importance.  For this reason, pesto is best when made from fresh basil (keep an eye out at your local farmer’s market).  In North America, unfortunately this limits our pesto season to the warmer months, but making extra at the end of the summer and freezing it for year round enjoyment is always a great idea.  If you grow it yourself or have access to fresh basil year round, even better.  Just know that your pesto will taste best when the basil is at peak freshness and flavor.  And let’s not forget that the quality of your olive oil and Parmigiano-Reggiano are equally as important.  Don't skimp!  These two ingredients give the pesto it’s richness; the olive oil being the glue that carries it all, and the cheese what gives pesto it’s deep umami flavor.  Getting real-deal Parmigiano-Reggiano is a non-negotiable here.

Here’s where this recipe goes against the grain: instead of pine nuts, pistachios are used.  Not only are pine nuts wildly expensive, I've found that they are just not the end all be all when it comes to making pesto.  In the kitchen I always say, why not experiment?  I once used pistachios when making my Vegan Roasted Red Pepper Pesto, simply because I didn't have pine nuts on hand, and the result was fantastic.  Pistachios are rich and flavorful, and nothing makes them less capable of making an incredible pesto.  In fact, they make a wonderful nutty alternative, and bring a whole new dynamic to this classic sauce.  Once you have all your ingredients, it only takes 10 minutes or less to go to pesto heaven, so what are you waiting for?

Micole Rondinone Pistachio Pesto

Pistachio Pesto

Renders roughly 1 cup concentrated pesto

  • 2 cups loosely packed fresh basil

  • 1/4 cup high quality extra virgin olive oil

  • 1 large clove fresh garlic, pressed or finely diced

  • 1/4 tsp sea salt (can add salt after if need be)

  • 1/2 cup shelled raw pistachios (unsalted)

  • 1/4 cup loosely diced pieces of pargmigiano-reggiano

  • Optional: Juice of half a lemon

Unless pre-washed, wash basil and remove leaves from the large stems.  If not using a garlic press for the garlic, you can finely dice your garlic or mash it up a bit in a mortar and pestle.  Shave off chunks of parmigiano-reggiano from your larger block, loosely filling 1/4 cup.  Then combine all ingredients except sea salt in a food processor (or blender) and blend, stopping occasionally to scrape down the sides. 

Once the pesto is mostly smooth, but still retains some texture, add salt to taste.  Depending how salty your parmigiano is, you may need either more or less than 1/4 tsp of sea salt.  If you find you need more olive oil, add a little more olive oil and blend again.  Love garlic? Add a second clove.  Lemon is optional but adds a nice subtle tartness.  When it's all done, go have fun and get creative!  Your pesto will last in the fridge for at least a week, or you can freeze it for enjoyment later.  To defrost, just let pesto sit at room temperature.

Homemade Roasted Red Peppers

Chef Tom Colicchio in his cookbook, Think Like a Chef, writes about the importance of making ingredients.

When I came to this chapter in the cookbook I was struck by the equal simplicity and importance of this idea. When you prepare a food, through roasting, seasoning, blistering, smoking, etc, before using it in your cooking or in a final dish, you find an opportunity to build flavor in a way that you can’t when you start with all fresh or raw ingredients. As a lover of condiments, which build flavor in a dish after it’s been cooked, I equally appreciate the making of ingredients. Roasting peppers under a broiler brings out their inherent sweetness and smokiness, and there must be a million and one great things that can be done with roasted red peppers. Once you make them from scratch, you’ll probably never go back to the store bought kind, unless in a pinch of course. So go ahead and roast up a whole batch of peppers to keep on hand. Put them on sandwiches, in salads, on homemade pizza and most definitely to make my Roasted Red Pepper Pesto and Creamy Roasted Red Pepper Sauce.

 
Micole Rondinone Roasted Red Peppers
 

Homemade Roasted Red Peppers

  • Red Bell Peppers

  • Extra Virgin Olive Oil

When it comes to roasted red peppers, surely you could use the store bought kind, but roasting your own is even more delicious and doesn't take long at all. Thoroughly wash and take off any store stickers from your peppers. I like to use Red Hollands, if you can find them. These are a beautiful bright red variety of red bell pepper, but regular works just great too. Turn your oven on to the high broil setting and let it heat up.

Cut the stem off the top of your pepper and remove the inner core along with all seeds. Place peppers on a baking sheet and drizzle with a little bit of olive oil. Once oven is hot, put peppers in. You'll need to babysit them a little bit from here on out: every 5-10 minutes, poke your head in the oven and check that the skin of the pepper has bubbled and gotten slightly charred on the side facing up. Once it has, use tongs or a clean oven mitt to rotate the pepper, allowing it to char on the next side. Continue to rotate and turn both peppers until they have bubbled and slightly charred all around.  Keep in mind - this does not mean burnt! You just want spots of charred skin - not a completely burnt pepper!

Once the peppers are done roasting, take them out of the oven and immediately move the peppers to a tupperware with a lid just slightly ajar, allowing steam to accumulate inside. This allows for the pepper to cool down enough to handle, and for the skin to become more easy to peel away from the rest of the pepper. Once cooled, take the peppers out of the tupperware and remove the skin. Cut into slices and your peppers are ready. Use immediately, or cool thoroughly and place in an airtight container in the fridge.

Herb Salsa

As a chef in 2020 it’s hard not to be inspired by Samin Nosrat. Her cookbook turned Netflix Special Salt, Fat, Acid, Heat is a game changer when it comes to thinking about cooking. Her food is a celebration of the very basic concept that great food can be made using intentional combinations of simple, high quality ingredients. She wrote a recipe for Basic Herb Salsa for NYT Cooking and I was very much inspired by that, as I stared at the heap of fresh herbs I’d been ignoring in the bottom drawer of my refrigerator. I made this version with the addition of scallion, less garlic and vinegar optional. It’s tangy, vibrant and of course herbaceous. I like to think this herb salsa is the thing you can pull out of the fridge to make just about anything look impressive: spread on sandwiches, over eggs, grains or chickpeas, or serve it with warm crispy bread.

 
Micole Rondinone Herb Salsa
 

Herb Salsa

  • ¾ cup Extra virgin olive oil

  • 1 bunch scallions

  • 1 bunch cilantro

  • 1 bunch parsley

  • Lemon zest of 1 small lemon

  • 1 small clove garlic, or ½ med/large clove

  • Salt

  • OPTIONAL: Vinegar of your choice

Finely dice 1 bunch of scallions and put in a bowl.

Finely chiffonade, or slice, cilantro and parsley and add to the same bowl.

Using a microplane or extra fine cheese grater, over the bowl zest 1 small lemon and grate fresh garlic. When you zest your lemon, make sure to only zest the yellow part of the fruit and not the white, bitter pith which is just underneath.

Pour in oil and gently fold all ingredients together. Salt to taste.

Add vinegar if you want the extra acidity, but note that vinegar will dull the color of your greens over time. Refrigerate and use within a few days over eggs, added to salad dressings, or with these Charred Sweet Potato Wedges.

Vegan Roasted Red Pepper Pesto

Simple ingredients make beautiful food.

Sauces and condiments allow us to play with our food, and there's nothing I love more than a good sauce.  I grew up in a house where sauce was always made from scratch, and you licked the spoon (a lot) while cooking.  While I would not recommend doing that while cooking for others, I do still love licking the spoon and making sauce from scratch.  Packaged, pre-made ones are filled with added sweeteners, low quality oils, shelf-stabilizers and generally unnecessary additives. 

When you realize just how easy it is to make your own, and how much better it tastes, trust me - you'll be on board too.  This gem of a recipe came to me one afternoon while dreaming up ideas in the kitchen.  It's fast, uncomplicated, and you can literally put it on anything.  Use it as a base for a salad dressing, spread it on toast, have it with eggs, toss it with your favorite pasta, dollop it on a pizza along wiht fresh ricotta.  As they say, the world is your oyster.

Micole Rondinone Vegan Red Pepper Pesto

Unlike most traditional pesto recipes, this one uses no cheese, so instead I blend in both pistachios and cashews to add complexity and creaminess.  Pesto also typically calls for pine nuts, but changing that up here brings a whole new dimension to the sauce, and despite being dairy free, once you taste it you will be surprised at how rich and creamy it is.  

The real beauty in this recipe, however, lies in the homemade roasted red peppers -- an ingredient which, once again, is all too easy to purchase in a jar, but not much more difficult to make yourself at home.  There is something so special about making certain pantry staples - ones we so often purchase in a jar, but can easily duplicate for half the price at home (i.e., homemade nut butters and nut milks!). Also, the depth and sweetness of homemade roasted peppers definitely surpasses that of the store bought kind.

Adding a food processor to your kitchen expands the possibility and potential for making these homemade staples, like nut butters, salsas and sauces.  Not only can you control exactly what goes into your food, you can make as much or as little as you want.  Because how many times have you purchased an entire jar of a specialty condiment or sauce only to use it once and let the rest go bad at the back of your fridge?  Make just 1 cup of this pesto and you'll be surprised that a little goes a long way, so no need to waste.  And when you get towards the end of a batch, add a little extra virgin olive oil and toss it on warm, al dente spaghetti.

Lastly, you will notice that in my recipe below I call for "a handful" of nuts and "large pinches" of salt.  This is because  my intention is to share my recipes with you in exactly the same way that I cook them, which is by feeling my way through.  While baking is a science, I do not believe that cooking always has to be.  Start with just a little salt, or a little garlic, or a little heat, and you can always add more!  Dive into this pesto with an adventurous spirit.  Cooking is about having fun after all, and reaping the benefits of a home cooked meal afterwards.


Vegan Roasted Red Pepper Pesto

Renders 1 cup concentrated pesto

  • 1/8 cup extra virgin olive oil

  • 1 large garlic clove, cut in half

  • 2 large pinches sea salt (salt to taste)

  • Handful shelled pistachios

  • Handful raw cashews

  • 2 Red Holland Bell peppers

  • 1 cup loosely packed & washed fresh basil leaves

The first and most important step of this recipe is roasting your peppers! Surely you could use the store bought kind, but roasting your own is even more delicious -- and doesn't take long! Wash and take off any store stickers from your Red Hollands -- these are a beautiful bright red variety of red bell pepper, but regular bells will work too if you can't find them. Turn your oven on to the high broil setting and let it heat up. Once hot, place your peppers inside the oven on a baking sheet. You'll need to babysit them a little bit from here on out: every 5-10 minutes, poke your head in the oven and check that the skin of the pepper has bubbled and gotten slightly charred on the side facing up. Once it has, use tongs or a clean oven mitt to rotate the pepper, allowing it to blacken on the next side. Continue to rotate and turn both peppers until they have bubbled and slightly charred all around. Keep in mind - this does not mean burnt! You just want spots of charred skin - not a completely charred pepper!

Once the peppers are done roasting, take them out of the oven and immediately place them in a Ziploc bag and leave sealed for about 20-30 minutes (you can also use a closed tupperware here). This allows for the pepper to cool down enough to handle, and for the skin to become more easy to peel away from the rest of the pepper. 

Once cooled, take the peppers out of the bag or tupperware. They will be very soft. You should be able to easily pull the stems out from the peppers, and make sure to remove all seeds that don't come out along with the stem. Next peel the skin off the outside of the peppers. Discard the stems, seeds and peels. Cut your cleaned up peppers into large/medium slices and place to the side. If you have not purchased pre-washed basil, wash approximately 1 cup of loosely packed basil leaves. The leaves do not need to be perfectly trimmed from the stems, as it will all be puréed. Lastly, grab your large clove of garlic, remove the skin, and cut in half.

Now we can start to throw our ingredients into the food processor. Add your 1 handful of pistachios. 1 handful of raw cashews, 2 large pinches of sea salt, garlic clove, roasted red pepper, clean basil and olive oil - and purée away!!! This recipe can be adjusted as you go, so if you prefer more olive oil, add more olive oil. If it's not salty enough, add another pinch of salt. Really love garlic? Throw in another clove! And when it's all done, go have fun and get creative with this sauce! 

Grilled Tomatillo Salsa

If you know me, you know I’m a salsa addict.

Then it should come as no surprise that when I wrote the recipe for my Crispy Pork Tostadas I needed to dream up the perfect salsa to go with it. While this tangy tomatillo salsa goes excellently with savory pork, like any great accessory, it goes well with many things — from eggs, to roasted veg or garlic chicken.

Micole Rondinone Grilled Tomatillo Salsa

Grilled Tomatillo Salsa

Renders roughly 16 oz.

  • 5 tomatillos, halved and grilled

  • Approx ½ - ¾ grilled jalapeño, without seeds for less heat

  • 1 ½ tbsp lime juice

  • Yellow onion, rounds grilled then diced, approx 1 cup

  • Large handful of clean cilantro leaves

  • Pinch of coarse kosher salt, adjust to taste

First prep all your ingredients. Clean your tomatillos and jalapeño. Halve tomatillos. Cut 3 or 4 onion rounds, approx 1/2 inch thick. Remove the top of the jalapeño, and cut in half lengthwise, removing seeds if you prefer your salsa less spicy.

On a grill or on my favorite Lodge cast iron grill pan, grill tomatillos, onion and jalapeño, doing this in rounds if the grill gets too crowded. Once everything is finished grilling, place it aside to cool while you rinse your cilantro in cold water. If you don’t have access to a grill or cast iron grill, you can use a regular cast iron pan or use a baking sheet with a wire rack and place in the oven under the hi broil setting, blistering the ingredients evenly all over.

Once cool enough to handle, dice grilled onion.

In a food processor or blender, add a large handful of clean cilantro leaves. Add grilled tomatillos, 1 cup of diced grilled onion, 1/2 of your grilled jalapeño (start with less at first if you need to be gentle with heat, and then add more to taste). Add lime juice and a pinch of salt. Blend until smooth, taste and adjust seasoning, adding more lime, cilantro, jalapeño or salt as you see fit.

Store in the fridge for up to 1 week.

Grilled Peach Pico

Pico de gallo gets a summery makeover.

Swap tomato for peach and you get a sweet and savory accent that goes great with these Crispy Pork Tostadas, or any other savory taco you feel like whipping up.

Micole Rondinone Grilled Peach Pico

Grilled Peach Pico

Renders 4-5 servings

  • 1 whole grilled yellow peach, approx 1/2 cup diced (2-3 large rounds of fresh pineapple or mango also works, depending on season and availability)

  • 2-3 large rounds yellow or spanish onion, grilled then diced, approx 1/4 cup

  • Pinch of coarse kosher salt, adjust to taste

This take on pico de gallo could not be simpler. Make extra if you want and keep in the fridge, up to 3 days.

Rinse 1 yellow peach and cut down the middle, removing the pit. If you can’t find peaches in season, use 2-3 large pieces of fresh mango or pineapple.

From your onion, cut 1-2 large rounds, choosing larger middle pieces.

For both onion and fruit, you want large flat rounds that will allow the greatest possible surface area in contact with the grill surface.

On a grill or on my favorite Lodge cast iron grill pan, place peach cut-side down and onion rounds, allowing them to char well and then turning over to char on the other side. If you don’t have access to a grill or cast iron grill, you can use a regular cast iron pan or use a baking sheet with a wire rack and place in the oven under the hi broil setting, blistering the ingredients evenly all over.

Once everything is finished grilling, place aside until cool enough to handle.

Dice peach and onion and mix in a bowl, with a pinch of coarse kosher sea salt.

Creamy Roasted Red Pepper Sauce

One of my favorite culinary transformations is that which happens when you put raw bell peppers under a broiler: they come out charred and soft, their sweetness accented. Because of that, Homemade Roasted Red Peppers are an essential ingredient for me when it comes to developing flavor in sauces (don’t miss my Roasted Red Pepper Pesto). This creamy celebration of roasted red peppers is perfect to use on roasted proteins or vegetables, salads or sandwiches.

MicoleRondinoneCreamyRedPepperSauce

Creamy Roasted Red Pepper Sauce

Renders roughly 1 cup sauce

  • 2 Homemade Roasted Red Peppers

  • 2.5 oz plain cream cheese

  • 1/2 jalapeno

  • 1 small shallot

  • 1/4 tsp paprika

  • Juice of 1/2 lemon

  • Sea salt

  • 1/4 cup Extra Virgin Olive Oil

The first step is making your roasted red peppers, recipe here. Take your cream cheese out and bring to room temperature.

Cut your jalapeno in half. From the half you’re using, remove white core and all seeds. Loosely chop into medium sized pieces. Cut 1 small shallot into similarly sized pieces. In the bowl of your blender, add all ingredients and blend until completely smooth. Adjust seasoning to taste. Serve immediately or keep in an airtight jar in the fridge. This sauce goes great over roasted vegetables, grains, and proteins.

Charred Sweet Potato Wedges w. Herb Salsa

Admittedly, I’m a sweet potato nerd.

I like sweet potato fries, sweet potato chips, sweet potato wedges, and charring them here and dressing them up with herb salsa is certainly not a bad way to eat your vegetables.

AM2A5388.jpg

Charred Sweet Potato Wedges with Herb Salsa

  • 1 large sweet potato, cut into wedges

  • Adobo seasoning (or garlic powder)

  • Smoked paprika (or paprika)

  • Cayenne powder

  • Extra Virgin Olive Oil

  • Sea Salt

  • Herb Salsa

  • OPTIONAL: Thick yogurt for serving

Some people like their sweet potatoes with no skin on, but the skin packs tons of nutrients so I choose to keep mine on. If you do too, just make sure to wash and scrub them thoroughly first. Cut your sweet potatoes lengthwise in half and then into 3 or 4 long wedges depending on the size of your sweet potatoes. If the wedges are very long, cut them in half.

Preheat your oven to 400 degrees. If you have parchment paper, line a baking sheet with it. In a bowl, coat wedges generously with olive oil, salt, adobo seasoning, cayenne and smoked paprika. Your wedges should be coated with enough oil so they’re a little bit shiny and the seasoning sticks, but not so they’re drenched in a pool of oil, so you can add a little at a time, tossing as you go. Use whichever of the spices you have: garlic seasoning works great in place of adobo seasoning, and any type of paprika will be just fine. If you don’t have paprika, use a little chili powder. Taste a little bit of the oil with seasoning to check if it’s to your liking. Salt to taste, as always.

Place the seasoned wedges on the baking sheet in a single layer and put in the oven. Keep the bowl you used to toss the sweet potato so you can brush any remaining seasoned oil on the warm wedges right before serving. After about 10-12 minutes, check to see if the side facing the pan is golden and crispy. If it is, flip all your pieces and roast another 10-12 minutes. You can continue doing this until you get the crispness you want on both sides. All ovens are a bit different so just keep an eye on them.

When they’re done, brush with the remaining seasoned oil and serve with plain thick yogurt, if you like, and top with this bright, Herb Salsa.

Avocado Poblano Salsa

There are few things that make me feel as accomplished as making basics from scratch:

homemade dressings, sauces, dips, condiments, pestos (Red Pepper Pesto or Pistachio Pesto, anyone?), and of course - salsa. In case you needed reminding, homemade always beats store bought, and while it does require just a tiny bit more forethought, I promise it will be worth it when a jar of this homemade salsa awaits you in the fridge. I always say, simple ingredients usually makes the best food — and this salsa is no exception. It’s a perfect example that you can create flavor magic with the combination of just 5 simple ingredients. Smokiness and mild heat from the blistered poblano pairs perfectly with creamy avocado and lime. If you’re someone who prefers your food mild, you can easily exclude the jalapeño, but I think it adds a worthwhile kick. And I should mention that it’s dairy free and therefore suitable for meat and plant eaters alike!

AM2A1574.jpg

Smooth and creamy, some might even say this salsa could be considered a dip. You can enjoy it all on it’s own with salty tortilla chips, but it also does well adorning so many things — like these nachos, enchiladas or vegan tacos. Even eggs could benefit from a spoonful, or use as a spread for a sandwich. When it comes to anything dip-able, the opportunities are endless, as far as I am concerned.


Avocado Poblano Salsa

Renders roughly 1 cup salsa

  • 2 poblano peppers

  • Juice of 3 limes

  • 1 avocado

  • 1 jalapeno pepper

  • 2 medium cloves of garlic

  • Sea salt

  • Paprika

  • 2 tbsps light olive oil (strong tasting olive oil will over power the sauce)

  • Water, as needed to loosen

The first step is blistering your poblanos. If it’s the season for it, you can grill the peppers, putting them directly on the grill and allowing them to blister evenly all over.  If not, use your oven on the high broil setting.  Place the clean, dry poblanos on a baking sheet on the top shelf.  You will need to monitor the peppers, leaving them up to 10 minutes, or until the skin start to blister and char.  Then, turn carefully to the other side, and again, watch for blistering, 5-8 minutes.  Continue until the pepper is blistered on all sides and remove from the oven.

Be careful when handling the pepper as there will be hot steam inside and underneath the blistered skin.  Place inside a glass Tupperware or other container and cover with a lid. The steam inside will continue to soften the pepper as it cools. Once cool enough to touch, cut off the top of the pepper and down one side, lengthwise. Remove all seeds and any of the white core that remains.  Place the soft pepper into the bowl of your food processor.  Then add half the lime juice, avocado, jalapeno, garlic cloves and 2 tbsps olive oil. Run the food processor until all ingredients are thoroughly broken down and the consistency is creamy.  If your blender is having a tough time running, add a splash or two of water to loosen. Add lots of salt to taste, and more lime juice as needed.  Sprinkle in a little paprika. Blend one more time to incorporate seasoning. Serve immediately or keep in an airtight jar in the fridge. Use within 2 days.