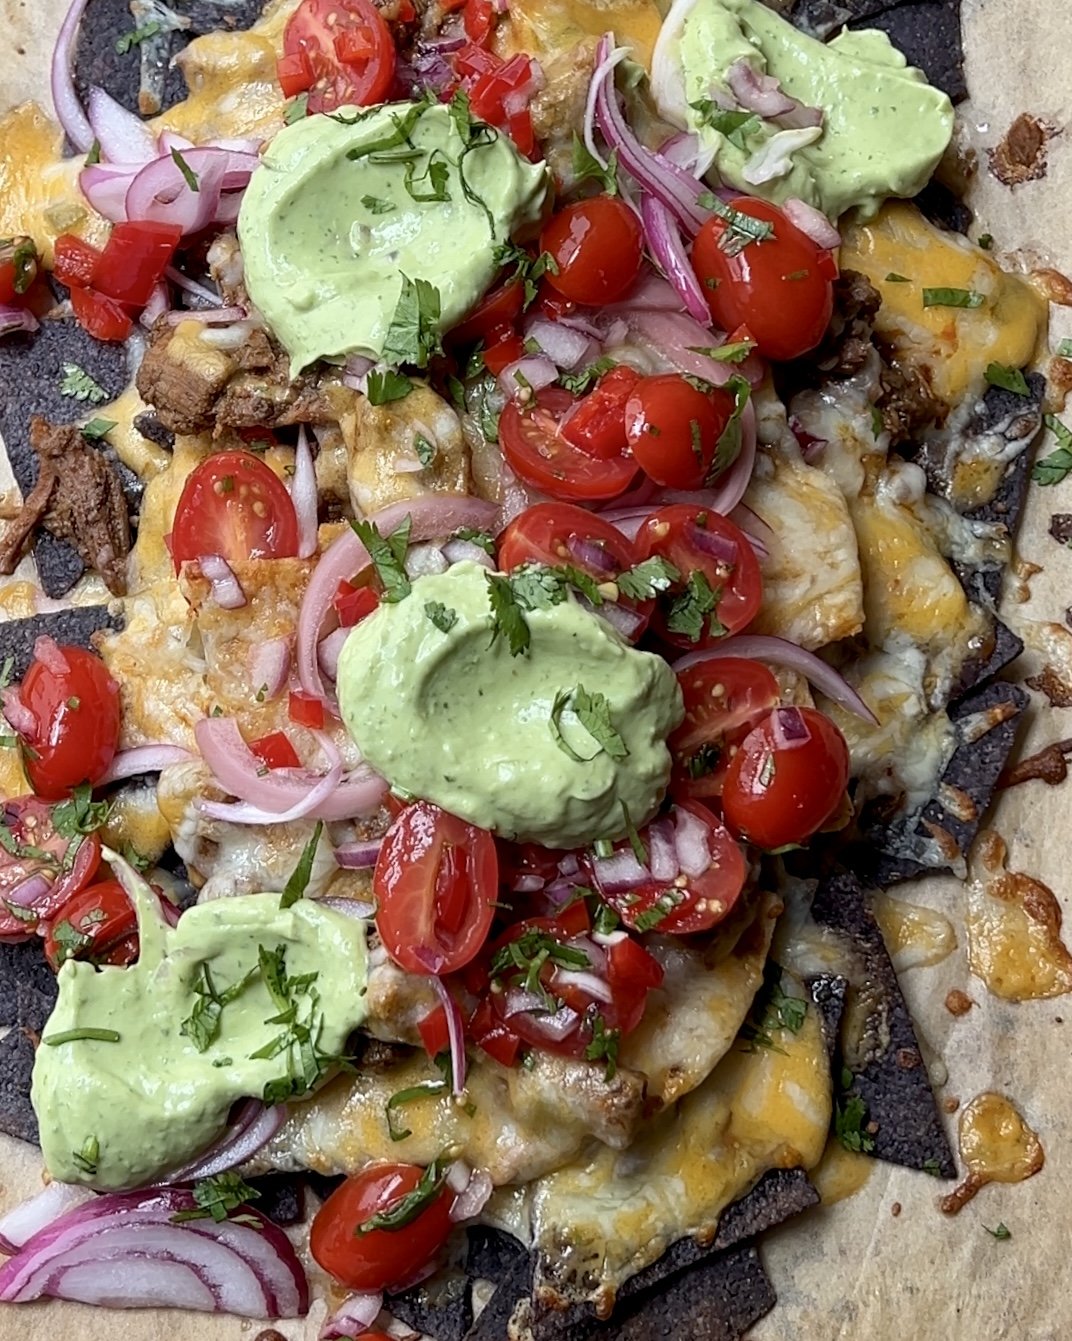
Birria Nachos w. Avocado Crema & Pickled Onions

Nachos are my idea of a good time.

In fact, I’d say they are one of my favorite meals of all time and I’ll explain why…

First, a bit of nacho history: nachos really do originate in Northern Mexico, and these traditional nachos are a simple, exquisite experience. My nachos, however, are closer to the Tex-Mex variety most of us have come to know and love.

Now let’s get back to my love affair with nachos: they are an explosion of messy toppings that embodies everything I love about food. When I tell people I’m a chef or that I write recipes they always ask, “What’s your favorite thing to cook?”. The answer is simple. Anything that has layers of flavor.

And the best nachos are inherently a multi-layered flavor experience, with each chip carrying a world of flavor on it’s crispy surface and each bite a choose your own adventure of toppings. Nachos are an endless pursuit of joyous flavor, which is why this recipe gets easy at the end — once your sauces are done. Then you can kick back, relax & get to exploring your flavor masterpiece.


Birria Nachos with Avocado Crema and Pickled Onions

For Avocado Crema

  • 1-2 Tbsps Sour cream, plain yogurt, crema etc

  • 3-4 limes

  • 1 tsp salt, to taste 

  • 1 Avocado

  • 1/2 - 1 cup loosely packed fresh Cilantro, washed

For Pico de Gallo

  • 16-20 cherry tomatoes, halved or 1 large tomato, diced 

  • 1/2 medium red onion, finely diced

  • 1 lime

  • Fresh cilantro to taste, finely chopped

For Homemade Queso (from Homer Murray’s recipe)

  • 8 ounces cheddar cheese, grated

  • 1 teaspoon cornstarch

  • 1 cup heavy cream

  • ¼ cup finely chopped pickled jalapeños

  • 2 tablespoons hot sauce

  • Kosher salt, to taste

OPTIONAL: Pickled Onions

  • 1/2 medium red onion, sliced into thin half rounds

  • 1/2 cup white vinegar and 1/2 cup water (enough to fully submerge onions)

  • 2-3 tsps sugar/honey

  • 2-3 tsps salt

  • 1 mason jar or tupperware

Start by prepping your salsas. They really do come together quickly and will keep in your fridge for leftovers, or for eating with other meals throughout the week!

To a blender or food processor add: 1-2 Tbsps sour cream, plain yogurt or crema, juice of 3-4 limes, 1 tsp salt, 1 avocado and 1/2 - 1 cup loosely packed fresh cilantro. Blend until smooth. Adjust salt as desired.

Make your pico. To a medium bowl or tupperware add: 16-20 cherry tomatoes cut in half (or 1 large tomato, diced),  1/2 medium red onion, finely diced, juice of 1 lime, along with chopped fresh cilantro and salt to taste.

If you are opting to make pickled onions which uses some basic pantry staples: cut the remaining half of your red onion into thin half rounds and add to a jar or tupperware with 1/2 cup white vinegar and 1/2 cup water (or enough to fully submerge onions), 2-3 tsps sugar/honey and 2-3 tsps salt.

The last thing to do is make the homemade queso, which I PROMISE is worth the extra steps!! In a medium saucepan but off the heat, toss 8 ounces of grated cheddar cheese with 1 teaspoon of cornstarch. Transfer the saucepan to your stovetop over medium heat and immediately add 1 cup heavy cream, ¼ cup finely chopped pickled jalapeños and 2 tablespoons hot sauce. Stir constantly as the cheese melts. When cheese has fully melted, salt to taste if needed and reduce the heat to low, stirring only occasionally as you warm up your birria.

Follow the package instructions to reheat birria in the microwave, or on the stovetop. Then place a piece of parchment down onto a sheet tray to build your nachos, starting with a layer of chips and then your birria beef, using a slotted spoon to pull out the whole pieces of beef from the liquid (keep the liquid for dipping at the end). Then, drizzle on your warm homemade queso before adding another layer of chips, birria and nacho cheese. Finally, finish with some grated low-moisture mozzarella or cheddar and place in your oven under the broiler on high for 1-3 minutes, keeping an eye so the nachos don’t burn. You just want to get your cheese all melty.

When the nachos come out, top with your pickled onions, pico de gallo and avocado crema. Serve birria liquid and extra queso on the side for dipping.

Tacos w. Slow Roasted Cod in Avocado Tomatillo Salsa

This hobby led to my favorite meal of the moment…

At the bookstore I’m that person idling with 10 cookbooks at my feet, slowly flipping through one at a time. I’ll never take any of them home with me, but I like to grab flickers of flavor inspiration & soak up inventive ingredient combinations.

Recently at the McNally Jackson Bookstore in Williamsburg I was flipping through Molly Baz’s Cook This Book when something caught my eye: a crunchy tostada, tender fish, a vibrant green salsa-ish. And I knew I had to make my own. That night these tacos were born and I simply cannot get enough of them. Don’t let the recipe intimidate you: it’s just a bit of easy prep work you can totally handle while sipping your favorite drink & chatting with a friend. The fish cooks in 15 minutes and then you’ll be happily feasting on these bright, spicy & creamy tacos that will (hopefully) blow your mind.


Tacos with Slow Roasted Cod in Avocado Tomatillo Salsa

Serves 2-3

  • 6 Tortillas, I strongly recommend Trader Joe’s Corn and Wheat Tortillas

  • Hot sauce, I like it with Trader Joe’s Habanero Hot Sauce

For Fish

  • 2-3 filets of fresh cod, 3/4 lb total

  • 3 garlic cloves, grated or very finely minced

  • 1.5 Tbsps Extra virgin olive oil

  • Approx. 1 tsp Coarse kosher salt

For Avocado Tomatillo Salsa

  • 1 medium - large avocado

  • 3-4 limes (sometimes they don’t render much juice so I like to buy extra)

  • 3 small-medium tomatillos

  • 1 small bunch cilantro (here’s what to do with leftover cilantro)

  • 2 large garlic cloves

  • A splash of olive oil if needed to loosen the salsa

For Quick Pickled Veg

  • 1/2 cup white vinegar

  • 1/4-1/2 cup sweet vinegar, like white balsamic or sherry vinegar (rice vinegar, white wine vinegar or ACV also work)

  • 1/2 tsp coarse salt

  • 1/2 tsp sugar (any kind will work)

  • 1-2 small Persian cucumbers, cleaned and cut into thin rounds

  • 1 small red onion, thinly sliced into half moons

  • 1 red thai chili, with seeds if you want it hotter, or use a __ if you don’t like hot pepper

Chipotle Mayo Drizzle

  • 2 Tbsps mayonnaise

  • 1 small can chipotle en adobo, usually in the International aisle of your grocery store or hot sauce of choice

Turn your oven on to 300 F. Take 3/4 lb cod out of the fridge to bring to room temp. You can also opt to quickly sear your cod in a hot pan with a bit of oil.

In the meanwhile, let’s make our quick pickle. to a large jar add about 1/2 cup white vinegar and then fill the jar to the 3/4 mark with another sweeter variety of vinegar like white balsamic or sherry vinegar. If you have neither, rice vinegar, white wine vinegar or apple cider vinegar will do. Pour all of your liquid into a small bowl.

To the vinegar in the bowl add 1/2 tsp salt and 1/2 tsp sugar. Stir well until dissolved into the vinegar (you can also do this in a small saucepan over low heat if you want to speed up the dissolving process).

In the meantime, to the empty jar add:

  • 1-2 Persian or mini hothouse cucumbers, cut into thin rounds

  • 1 small or 1/2 medium red onion, thinly sliced into half moons

  • 1 red thai chili, with seeds if you want it hotter, or use a __ if you don’t like hot pepper

Finally, pour your vinegar into the jar over the vegetables. If you heated the vinegar, allow it to cool before adding back to your jar.

Now, to make the avocado tomatillo salsa - the magic behind this recipe. Lightly oil a stainless steel pan, cast iron pan or cast iron griddle with a neutral oil (avocado, sunflower, safflower, canola, etc). Place over medium heat. Cut three tomatillos in half and two garlic cloves in half, and lay flat side down in your pan. It should be sizzling. Sear until browned, then flip and sear another few minutes on the other side. We’re looking to get browning on the garlic and a little char on the tomatillos (they may soften and that’s totally okay). When sufficiently charred remove from the pan carefully using tongs, set aside and turn off the pan. 

Get out a blender or food processor. To the bowl of the blender add large handful of cilantro with stems, half your avocado, juice of 1-2 limes (you can always add more later), and finally the charred tomatillos and garlic. Blend until smooth and then add a pinch or two of salt, tasting until it hits the sweet spot. This salsa should be citrusy and bright, so if you only used one lime consider adding another. Add to a jar and set aside.

It’s time to cook your fish: place your fish filets in an oven safe skillet or baking dish. Drizzle with 1.5 Tbsps olive oil, 1 tsp of coarse kosher salt (use less if you have fine salt), and 3 very finely minced or grated garlic cloves. Rub the filets with the salt, garlic and olive oil so they are evenly coated. 

Place in the oven and roast for 12-20 minutes, depending on the size of your fish filets. You want it to be flaky and tender, so try to avoid overcooking. If smaller filets finish first, transfer them to a plate and place on a plate tented with aluminum foil. When all of the fish is done, transfer it onto the plate.

While the fish cooks, your final steps to prepare:

  • This is optional but really makes the dish spectacular so I recommend it. In a small ramekin or bowl, add 1 tsp chipotle en adobo or hot sauce with 2 Tbsp mayonnaise and juice of 1/2 a lime. Mix until combined. You could also use a pre-made chipotle mayo but homemade is way better.

  • Warm your tortillas: you can do this in the microwave with this trick, but I like to warm mine over the small to medium burner on my stovetop carefully using tongs. Keep the flame low but not so low that it doesn’t reach the tortilla. It may need 30 seconds - 1 minute on each side. Look for a little charring and that it’s warm. Transfer to a plate as you warm the tortillas and cover with a clean kitchen towel or foil.

  • Take the other 1/2 of the avocado leftover from making the salsa, peel the skin off the outside, lay flat side down and dice. Add to a bowl to serve with the tacos.

It’s time to serve. Uncover the covered fish and using a fork, gently flake it apart into small pieces. Drizzle with plenty of your avocado tomatillo salsa. Then build your tacos - a little fish, a drizzle of chipotle mayo, some avocado and pickled veggies. Enjoy this flavor train!

Savory Shiitake & Creamy Pinto Bean Burritos

If you could take a peek inside my Seamless order history…

you would discover that I’ve recently become a bit obsessed with mushroom burritos — and so I decided it was time I make my own.

As it turns out the most difficult thing about this recipe is mastering your burrito rolling but once you do, it’s a skill that will not go to waste because you’ll want to make these again and again.

After all, if you, like me, live for dynamic, layered flavor, burritos are literally a dream come true: all of that savory, spicy, crunchy, creamy goodness married underneath a soft, warm blanket of tortilla. Hello! Every bite is like taking a tiny flavor adventure.

For this burrito, tender, umami mushrooms are tossed in a buttery spice blend and layered with savory rice, sharp cheddar and creamy pinto beans - but please do not stop there! Include your add-on’s of choice: I like mine with crunchy radishes, homemade guacamole & sour cream. And don’t forget your favorite salsa or hot sauce. As always, follow your flavor intuition and make this recipe your own.


Savory Shiitake & Creamy Pinto Bean Burritos

Makes 1 Burrito

  • 1 burrito-sized flour tortilla

  • 2 medium Shiitake Mushrooms, cleaned & dried (you can also substitute with other mushroom types)

  • Kosher salt

  • Extra virgin olive oil

  • Neutral oil (avocado, sunflower, safflower, canola)

  • 1 Tbsp unsalted butter

  • 1/4 tsp Adobo Seasoning

  • Shy of 1/4 tsp Smoked Paprika

  • Shy of 1/4 tsp Ancho Chili Powder or Cayenne Powder

  • 1/4 tsp Garlic Powder

  • 1/4 tsp freshly ground Black Pepper

  • 2 Tbsps Creamy Pinto Beans

  • 3 Tbsps cooked rice, cooked in vegetable broth with a pinch of salt

  • 2-4 thin slices Sharp White Cheddar, more if you want it extra cheesy!

  • 2-3 Tbsps Sour Cream

  • OPTIONAL: thinly sliced radish rounds, homemade guacamole or pico de gallo

First cook up a batch of 1/2 cup uncooked rice and my Creamy Pinto Beans. These will render a few burritos but the following is instructions for making one burrito.

TIP: You’ll want to cook your rice in vegetable broth instead of water (half broth, half water works too), and add a pinch of salt. This imparts it with a lot more flavor.

If you plan to make homemade guacamole or pico de gallo, you will prep those first, too.

Then once your rice, pinto beans and any add-on’s are ready, make your mushrooms: score your clean, dry shiitakes along the top side, making cuts that are about an 1/8 inch deep.  This helps them to lay flat in the pan and cook evenly. Hit both sides with a drizzle of olive oil and a sprinkle of salt. Heat a sauté pan over medium high heat, and then add the mushrooms to the pan, scored side down: they should sizzle! If they don’t, remove them and let the pan get sufficiently hot first.

When the top side is golden brown, flip and sear until the bottom is golden - a few minutes per side.

Then remove the pan from the heat and place mushrooms on a cutting board until cool enough to handle. Cut into strips that are 1/2 inch wide .

Place your now empty pan back over a medium heat. To the pan add 1 Tbsp of butter and 1/4 tsp each of: Adobo Seasoning, Garlic Powder and freshly ground Black Pepper. Add just shy of 1/4 tsp of Smoked Paprika, and Ancho Chili Powder or Cayenne Powder. Stir everything together so that the spices are evenly distributed throughout the butter. When the butter is starting to get bubbly, add your strips of mushrooms back to the pan and toss in the butter and spice mixture for a minute.

Then remove the mushrooms again and set aside, leaving all of the excess butter and spices in the pan over medium heat. Now, don’t walk away! Stand over the butter just until it starts to smell toasty and turn brown. At that point immediately remove the pan from the heat and add your 3 Tbsps of cooked rice to the brown butter and spice mixture. Toss so that the rice is thoroughly coated. If you burn your butter and spices, don’t worry just skip this step and use plain cooked rice. You can also add fresh cilantro to your rice if you like.

Set the pan off to the side and make sure your burner is turned off. It’s time to build your burrito: to a large burrito sized flour tortilla, lay down your rice, beans and mushrooms a little bit off-center. Then top with your add-ons: sliced cheddar cheese, radish, guacamole, sour cream, pico de gallo etc. The key here is making sure you don’t overstuff the burrito or make it too liquid-y. If you do, it will be impossible to wrap (that’s why I’ve given you measurements for how much rice & beans to add).

To go about wrapping your burrito, first fold in the two sides. Then lift the side of the burrito that is facing you and fold it over those two sides and all of the ingredients. Use that to tuck in all of your ingredients, pulling them towards you into a little pouch. Finally turn the burrito over to seal that last side. If you’re a visual learner I love this video tutorial from Thrillist.

Now that your burrito is rolled, it’s time to get it warm and crunchy. This is where the magic happens!

That pan you had your spices & butter in? Give it a good rinse and then dry it off completely (seems annoying, I know, but using one pan for all of this really just means fewer dishes later!). Place this pan back over a medium-high heat and add enough of a neutral, high-smoke point cooking oil to just coat the entirety of the bottom of the pan. When the oil is shimmering and hot, add your burrito to the pan FLAP SIDE DOWN. You first want to seal this side off. Allow it to get golden brown and crispy, a few minutes depending on how hot your pan is. Then flip and repeat on the top side, until golden and crispy.

Eat while warm and enjoy with even more of your favorite toppings and hot sauces!

Sichuan Peppercorn Skirt Steak Tacos w. Black Garlic Labne, Scallions & Honey

Tangy Sichuan peppercorns, savory black garlic, and fresh habanero…

One of my favorite kitchen tools is the humble mortar and pestle. Sure, I don’t whip this thing out everyday, but on the occasion I do I feel so connected to my food and in control of flavor. While I use it mostly for grinding whole spices, I also love it for making marinades, like this one, or sauces like a mortar-and-pestle Pesto. Start by grinding whole ingredients and finish with fats or liquids. Here I combine Sichuan peppercorns with black garlic, fresh habanero and a mix of other smokey, savory spices to get a crusty layer of flavor on the steak once seared.

My big note with this recipe — don’t be turned away by the ingredient list. If you can’t get access, substitutions can be made: instead of black garlic use whole roasted garlic cloves, and swap labne for a thick, whole fat, tangy greek yogurt. That being said, the Sichuan peppercorns are sort of a must and these are a great opportunity to expand your flavor library. I also encourage you to try and get your hands on my new favorite Red Habanero hot sauce from Queen Majesty, based a whole 11 minutes from my apartment right here in Long Island City, Queens!! Lastly, you can always rely on me to deliver food full of unexpected flavors so there were some creative decisions, like finishing with honey, that I'll just need you to trust.

 
AM2A8286.jpg
 

Sichuan Peppercorn Skirt Steak Tacos with Black Garlic Labne, Scallions & Honey

STEAK MARINADE

  • 1/2 Tbsp cumin

  • 1/2 Tbsp Sichuan peppercorns

  • 1 clove black garlic, steamed to soften, or 1 clove of roasted regular garlic

  • 1/2 tsp smoked paprika

  • 1 tsp natural turbinado sugar, or any kind of granulated brown sugar

  • 1/4 - 1/2 of a small fresh habanero, finely chopped with seeds for more heat (.1 -.2 oz)

  • 3/4 tsp salt

  • Shy of 1/4 cup neutral oil

  • 2 tsp tamari

BLACK GARLIC LABNE

  • 1/2 cup labne

  • 4 cloves black garlic, steamed to soften, or 4 cloves of roasted regular garlic

  • Juice of 1/2 lime

For this recipe, I loved using black garlic: it’s an aged garlic that is less sharp than raw garlic and super savory. You can find it online and in some specialty food stores and while it’s a bit of an investment, it’s great to have on hand in your flavor library. If you can’t get access to it, slow roast garlic and use that throughout instead. Also, if you can’t access labne, use a thick, full fat, tangy greek yogurt instead, like Fage.

Start by making your marinade. If you have a mortar and pestle, use that. Otherwise, blend everything with the oil and tamari in a food processor. You are going to need: 1/2 Tbsp cumin, 1/2 Tbsp Sichuan peppercorns, 1 clove black garlic, steamed to soften (or 1 clove of roasted garlic), 1/2 tsp smoked paprika, 1 tsp natural turbinado sugar, or any kind of granulated brown sugar, 1/4 - 1/2 of a small fresh habanero, finely chopped with seeds for more heat (.1 -.2 oz), 3/4 tsp salt, shy of 1/4 cup neutral oil and 2 tsp tamari.

Add the steak and marinade to a Tupperware or reusable Ziploc bag, making sure the steak is covered all over. Put in the fridge for 1 hour, but ideally up to 24 hours.

Next, prepare the black garlic labne. I find that steaming the black garlic cloves first allows them to fold into the labne more uniformly. Place 4 black garlic cloves in a steamer, or you can do what I did and simply suspend the cloves inside a small pot over about 1/2-1/4 cup of boiling water using a small mesh strainer. Cover with a top and let steam for a few minutes. Skip this step if you are using roasted garlic. Blend garlic, labne and juice of a half a lime until smooth.

When it’s time to sear the steak, be sure to bring the steak to room temperature first. Using a cast iron (or stainless steel pan), heat the pan until very hot with a bit of smoke coming off of it. Then add the marinated steak, searing over high heat 2-4 minutes per side for medium rare, depending how thin your cut of steak is. Go a little longer if you want it more well done. Let the steak rest, 5-7 minutes.

While the steak rests, char your tortillas carefully over a low-medium flame on your stovetop burner, using tongs to flip them every 30 seconds or so. If you don’t have a gas stovetop, crisp them a little under your oven broiler.

When ready to serve, cut the steak into strips or cubes. Spread a spoonful of black garlic labne on each tortilla and top with steak. Top each taco with scallions cut on the bias, a drizzle of honey and this Queen Majesty Red Habanero & Black Coffee hot sauce. I love how it has a balance of heat and flavor. Find out where you can buy it here.

Plant Based Roasted Sweet Potato Queso-Style Dip w. Caramelized Onions

Seriously, who doesn’t love a dip?!

I’m obsessed with female owned nut milk brand Three Trees. When I worked with them last year I fell in love with their incredible, creamy milks and instantly knew it would make the perfect base for a plant based dip. I’m also going to recommend some of my favorite tortilla chips from Xochitl for their ratio of thinness to dip-carrying-capacity.

Yes, this is a plant based “queso-style” dip and I put that in quotations in case you’re someone who does not believe in veganizing: I would hate for you to miss out on this dip for that reason. It’s just a great dip trying to be great! Made with simple plants and lots of flavor, we start by roasting the sweet potato and sautéing onions. This may seem like an extra step but don’t skip it, please. The name of the game to great food is LAYERING FLAVOR. When we roast and sauté our ingredients, we impart them with flavor before we’ve even blended and seasoned our dip. You can do this up to 2 days in advance, and then blend up later. Come over and make the recipe with me here!

 
AM2A7775.JPG
 

Plant Based Roasted Sweet Potato Queso-Style Dip with Caramelized Onions

Serves 6-8

  • 2 x medium sweet potatoes, 1 lb total

  • 1 medium yellow or Spanish onion

  • 1 Tbsp unsalted butter

  • 1 small white onion

  • 1/2 tsp cayennne powder

  • 1/2 tsp cumin powder

  • 1/2 tsp smoked paprika

  • 1/2 tsp chili powder

  • 2 cups Three Trees original almond milk

  • 2 Tbsp nutritional yeast

  • 4 Tbsps white wine or apple cider vinegar

  • 2 tsp chipotle Cholula, and more for serving

  • Fresh cilantro

  • 1 lime

  • Kosher salt

  • Coconut oil

  • Olive oil

  • OPTIONAL: 1.5 tsps corn starch for thickening

  • Xochitl Organic Blue Corn Tortilla Chips

Preheat oven to 380F degrees.

Peel and cut sweet potatoes into rounds. Add to a mixing bowl with 1.5 Tbsp coconut oil and a sprinkle of kosher salt. Toss to evenly coat.

Lay sweet potatoes on a baking sheet in a single layer and bake for 30 mins or until golden on both sides, flipping halfway through. When finished, cut rounds down loosely into quarters for easier blending.

In the meantime, let’s make caramelized onions: take your medium yellow or Spanish onion and remove the top and bottom root end so that it’s flat on both ends. Peel off outer skin. Cut onion in half, top to bottom, and then slice into thin, half moons. Add all the onions to a large pan with a splash of olive oil. Cook 15-20 mins over low heat, stirring frequently. If the pan gets dry, add a splash of water and mix. If the onions are cooking too fast and burning, turn the heat down.

When the onions are significantly cooked down, add 1 Tbsp butter to the pan and continue to cook over low heat until they are a deep golden color. Add a sprinkle of kosher salt. Remove from heat and set aside.

In a pot with a splash of olive oil, sauté 1  cup of loosely diced white onion. After a few minutes when the onion has started to soften, add a sprinkle of salt and 1/2 tsp cayenne, cumin powder, smoked paprika and chili powder. Mix and cook together another minute or so.

Then remove from the heat and add sweet potato pieces to the pot along with 2 cups Three Trees almond milk. Blend using a food processor, immersion or standard blender until smooth.

Taste and add a touch more salt if it needs. Also add 2 Tbsp nutritional yeast, 4 Tbsps white wine or apple cider vinegar and 2 tsp chipotle Cholula. Once all blended, place back in the pot and bring to a simmer, mixing frequently so you don’t burn the dip on the bottom of the pan. Once it’s bubbling, add a slurry to the pot to thicken - 1.5 tsps corn starch with 2 tsps water. The heat will activate the starch, thickening the dip, so continue to cook and mix for a minute or two after adding.

Remove from the heat and let cool a few minutes. Top with plenty of fresh cilantro, juice of half a lime, and all of the caramelized onions. You can even add another splash Cholula if you like. Live your best dip life!

Vegan Sweet Potato & Black Bean Tacos

A few weeks ago I had the wonderful opportunity to collaborate with My Inner Glow. Founded by Kyle Somersall, My Inner Glow brings people together for inspired meditation based events.  When he initially approached me and asked me to cook for one of his upcoming events, I was excited to team up with him, and to put together a menu for the evening.   We started the night outdoors in a beautiful backyard in Kips Bay, Manhattan.  I served soccas, which are thin crepes made of chickpea flour, on parchment paper and adorned them with varying combinations of delicious toppings.  For the main course (wait for it...) we had tacos, which if you know me even on the most introductory level, will likely not surprise you.

 
Micole Rondinone Vegan Tacos
 

I knew I wanted one of the tacos to be vegan/vegetarian friendly, so I decided to revisit a classic combination: sweet potato and black bean.  I deepened the flavor of the black beans with smoked paprika and lots of lime juice, and made them extra creamy by crushing them in the pot slightly while they were cooking.  I made the sweet potatoes spicy AND sweet with serrano chile powder.  And, because I am undoubtedly a condiment & toppings kinda lady, I topped this all off with homemade cashew cream, avocado, fresh cilantro, aleppo pepper and a squeeze of lime for good measure.  Ideally this taco is finished off with one of my favorite salsas, La Fundidora's Humo Salsa.  What is better in life than eating a warm tortilla jam-packed with deliciousness on a balmy May night in New York City?!? 

In the past year, the lowly sweet potato has managed to land itself right up there on my list of top 10 favorite foods.  Why?  Because sweet potatoes are incredibly versatile, satiating and tasty.  In this case, their sweetness perfectly offset the citrusy, savory black beans, and of course, I added some heat to them with chili powder, because to me there's nothing like the combination of sweet, savory & spicy

I am someone who loves to layer flavors and ingredients with contrasting mouth feel, so, of course, I added in yet another element: creamy.  Which brings me to another of my new favorite foods: cashew cream.  Insanely easy to make, delicious and dairy free, cashew cream has actually changed my life.  As a life long cheese and sour cream addict, Kite Hill's spreads were the first of the nut-based vegan cheese replacements to pull me away from my dairy addictions, and while this stuff is SO good, it's not cheap.  And while the cost of nuts can also add up, a bag of cashew pieces from Trader Joe's will cost you the same as 1 container of Kite Hill ($6.50), and will render you much more.  All you need is 1 cup of soaked cashews + water (which is free) to make more than 8 ounces of delicious, nutty cashew cream.  As I mentioned before with my Vegan Roasted Red Pepper Pesto recipe, it really is an amazing tool to be able to make your own pantry staples at home for a fraction of the cost.  It will only take you a little forethought + 5 minutes or so to blend your way to cashew cream happiness!  And it's worth it - I promise.  

Tacos are best when they have lots of delicious toppings, in my opinion, so don't forget your garnishes, and feel free to add others!!  Grilled corn?  Pickled red onions?  The options are endless.  And of course, don't forget your salsa!!  My suggested salsa pairing is La Fundidora's smokey, delicious Humo Salsa, which I purchase at the Whole Foods here in Chelsea, New York.  If you can't find it, don't worry, Cholula works too!!  I like the Original flavor best, but salsa is a very personal choice, so do what feels right to you.  And most importantly, don't be afraid to eat 2 (or maybe 3) of these tacos in one sitting.

Micole Rondinone Vegan Tacos

Vegan Sweet Potato and Black Bean Tacos

6 x Corn Tortillas

For Sweet Potatoes

  • 1 Large Sweet Potato, diced

  • ½ TBSP olive oil

  • ¼ TSP serrano chile powder

  • ¼ TSP cumin

  • Heaping ¼ TSP salt

For Beans

  • 1 lime - juice of 1/2 or whole, if half doesn’t bring out the lime flavor enough

  • 1 can black beans

  • ¼ TSP garlic powder

  • ¼ TSP smoked paprika

  • ¼ TSP salt 

For Cashew Cream ** PREP NOTE - You will need to soak your cashews overnight

  • 1 cup raw cashews or cashew pieces - soaked overnight

  • 1/2 cup water

  • Pinch of sea salt

Garnishes

  • 1 Avocado

  • Aleppo Pepper

  • Fresh Cilantro

  • 1 Lime (for lime wedges)

  • Suggested Salsa Pairing: La Fundidora Humo Salsa OR Cholula Original

Let's start by making our cashew cream.  Take your soaked cashews and put into the bowl of a food processor with a 1/2 cup of water and a nice pinch of sea salt (a high speed blender is ideal here if you own one, but a food processor works great too).  Allow the food processor to run for up to 4 minutes, or until the cashew cream is silky (it will take about the half time in a high speed blender).  If using a food processor, stop intermittently to scrape down the sides.  When the cashew cream is finished, pour into a jar and put in the fridge.

Next, you'll want to roast your sweet potatoes.  Preheat your oven to 400 degrees while you get to dicing the sweet potato.  I like to roast it on a high temperature so that the sweet potato bits get nice and crispy.  Here is my tactic for dicing the sweet potato: cut into rounds, then pile up 4-5 rounds at a time and dice down into squares/rectangles.  Throw the diced pieces into a mixing bowl as you go.  Once the entire sweet potato is diced, add the olive oil and spices, and toss to coat thoroughly.  Next, you'll want to spread the coated sweet potato bits onto a flat baking sheet (parchment paper optional).  The key here is that the sweet potato is laid out in a single layer, without overlapping any of the pieces. This allows the sweet potato to cook thoroughly all over and get nice and crispy!  Put the sweet potato in the oven and set a timer for 15 minutes.  After 15 minutes check the sweet potato, and add more time if necessary.  The sweet potato bits should be golden and crispy around the edges.  It's OK if a few of the smaller pieces get burnt.  You can always separate those pieces after to avoid the bitter flavor.  When the sweet potato is done, put it to the side and turn off the oven.

While the sweet potato is in the oven, you can get the beans ready.  Empty the can of beans into a strainer and rinse off the liquid from the can.  Put the cleaned beans into the sauce pan add the spices and juice of your lime.  You can start with half a lime here, mix and then taste.  The lime should come through distinctively, so if half the lime is not enough, add the other half.  While they start to heat up, use the back of a big spoon (or a potato masher if you have) to slightly mash the beans.  You don't want a total pulp here, but mash until the texture starts to become slightly more broken down and creamy.  When the beans are ready, you can turn the heat down to low so that they stay warm.  If they start to dry out, just add a little vegetable broth or even a splash of water to loosen them.

It's almost time to build our tacos!!  Depending on how small or large your sweet potato is, and how generously you fill, the amount of tacos this renders will vary.  Grab 6-8 corn tortillas, and get ready to char them over an open flame.  Turn on one of the burners on your stove on very low, and grab a pair of tongs.  Put your first tortilla directly on the burner, hovering above the flame.  Heat and slightly char on both sides, about 45 seconds each, using your tongs to flip the tortillas.  Put the warmed tortillas onto a plate as you go.  If you don't have a gas stove, you can char your tortillas in a hot pan.

Once they're all heated, start by spreading beans onto each taco.  Next, top with sweet potato bits.  Add a dollop of cashew cream to each as well as 2 slices of avocado, a few leaves of fresh cilantro, a shake of aleppo paper, a squeeze of fresh lime juice and one of the two suggested salsas.  My favorite is the Humo Salsa, which is sold here in New York at Whole Foods, but if you can't find it, good old Cholula Original works too.

Warm Black Sesame Cardamom Pudding w. Toasted Coconut

Can you believe this is my first published dessert recipe? Admittedly, I’m usually more of a savory gal, but when I was approached to collaborate with Three Trees and Learn From A Chef on a delicious recipe and fun, virtual cooking class, I could not turn down the opportunity. Their Black Sesame Nut & Seed milk is lightly (& naturally) sweetened with dates, has no fillers, gums or additives and gave me the perfect base for this delicious pudding. Infusing the milk with whole cardamom, one of my favorite spices, makes it feel really fresh, aromatic and nourishing. Also, did I mention this pudding is 100% plant based? In this recipe, we harness the magic of cornstarch to achieve a thick, creamy pudding and top it all off with a freshly toasted coconut topping. And as always, you can feel free to add anything else that makes your heart sing! I want you to make this recipe yours…

And in case you missed the live class, you can rewatch and learn the recipe with me here!

AM2A6751.jpg

Warm Black Sesame Cardamom Pudding with Toasted Coconut

1 Serving 

  • 5 oz black sesame milk

  • 2 oz full fat coconut milk

  • 1.5 tbsp cornstarch, loosened with 2 tbsp water

  • 1 dash vanilla extract

  • 6 cardamom pods

  • 1-2 tsp maple syrup, to taste

  • 1 tsp coconut oil

  • 1 cup coconut flakes

  • Black sesame seeds

Measure out Three Trees Black Sesame Milk and full fat coconut milk in a measuring cup, mix to incorporate and set aside.

In a mortar and pestle, or on your cutting board, gently smash 6 cardamom pods to expose the seeds. Place a small saucepan over medium heat. Once pan eminates heat, add cardamom pods and gently toast, swirling around in the pan, about a minute until fragrant.

Pour in mixture of sesame and coconut milk. Mix to combine, and then let warm just until bubbles start to form around the edges of the pan. Then remove from heat, cover and let sit anywhere from 10-30 minutes, depending how much cardamom flavor you prefer.

Meanwhile, in a small bowl, create a slurry: combine cornstarch with cold or room temperature water and whisk, scraping the bottom and sides, until you form a uniform, creamy liquid. Set aside.

Measure out 1/2 cup of coconut flakes for your topping. This renders more than 1 serving, so you can keep what remains to use in granola, on top of yogurt, or just as a slightly sweet snack. Get out a small to medium sauce pan, cast iron is great, but you can work with whatever you have at home.

Strain your infused milk through a fine mesh strainer into a bowl to remove cardamom and loose seeds. Rinse your saucepan and dry of any excess water. Add the strained milk back to the pan and bring the temperature back up over medium heat. When the milk starts to get warm, add a dash of vanilla extract and maple syrup to taste and mix, gently scraping the bottom of the pan to make sure it’s fully incorporated. Taste and make sure it’s as sweet as you want it!

If your slurry has separated, give it a good whisk before adding. When your milk has just started to reach a gentle boil, a few bubbles coming to the top here and there, while whisking, slowly pour in the cornstarch. Your milk must be sufficiently hot for the cornstarch to activate. Once added, you should immediately see your milk turn into a pudding like texture. Remove from the heat as you continue to whisk. Add to a medium sized bowl and set aside to cool. 

While that cools, we quickly prep our coconut topping. In your pan, heat 1⁄2-1 teaspoon coconut oil, or neutral oil over medium heat. Once the pan is warm, add coconut flakes, mixing constantly to ensure they don’t burn. When most of the flakes have turned a golden color, remove from the heat and put into a small bowl. For a delicate sweetness, add a pinch or two of sugar while warm, and toss to coat the coconut flakes evenly.

Give your cooled pudding a mix before plating, to ensure a smooth texture. Top with warm toasted coconut, and any of your other favorite toppings, like seasonal fruit!

 
Micole Rondinone Black Sesame Pudding
 

Smoked Salmon Toast

Equal parts crisp, crunch & smoke.

Smoked salmon sandwiches have quickly become a part of my daily rotation. Loaded with fresh ingredients that need little prep, it’s quick to come together and offers a refreshing change from the daily rotation of other more expected sandwiches. The key, as always, is using the best ingredients you can find: a great bread and high quality smoked salmon are key. And it’s totally worth the extra few minutes it requires to make your own scallion cream cheese. Of all the things you could put on toast for breakfast, lunch or brunch, I promise this one won’t disappoint.

AM2A5300.jpg

Smoked Salmon Toast

  • Scallion cream cheese, store bought or homemade

  • Good bread, like sourdough

  • Tomato, thinly sliced rounds

  • Cucumber, thinly sliced rounds

  • Red onion, thinly sliced

  • Sprouts

  • Baby greens

  • Lemon

  • Sea Salt

  • OPTIONAL: Capers

You can use store bought scallion cream cheese but homemade is easy, and really delicious: mix a pound of softened plain cream cheese with about ½ cup sour cream (or heavy cream). Mix and fold in freshly cut scallion.

Take out all ingredients. Slice cucumber, red onion and tomato into very thin rounds. Set aside. Put bread in the toaster. When done, spread both pieces of bread with cream cheese. Add desired amount of smoked salmon to one piece of bread. Top salmon with thinly sliced cucumber, tomato, red onion and sprouts. To the other piece of bread, add greens on top of cream cheese, lightly pressing down. Sprinkle sprouts with sea salt, freshly ground black pepper and a drizzle of fresh lemon juice. Add capers without liquid, if you like. Close sandwich, cut and eat immediately.

Roasted Vegetable Goat Cheese Enchiladas

Sometimes the best ideas come from a place of necessity, and when we least expect them. 

Although I took a bit of a hiatus from writing recipes, that does not mean that the cooking has stopped, and certainly not the ideas.  I found that I was deep in a place of “working” on my personal work because I felt I ‘should’, because I ‘had to’.  So I decided to take a break and return when I was ready to create from a place of joy.  By allowing joy to fuel my work, I not only feel more fulfilled, but also create work that is completely genuine.

On this particular Saturday, I woke up with a desire to cook something that was both nourishing and delicious (and let’s be honest, I also just had a hankering for enchiladas).  I had recently thrown together a chilaquiles-like dish using goat cheese and corn, and I couldn’t get the flavor combination out of my mind.  So I decided to elaborate on it: spread corn tortillas with goat cheese, fill them with sweet & savory plant-based goodness, and bake with more cheese on top.  What could go wrong?  Well, in this case, nothing.

Micole Rondinone Roasted Vegetable Enchiladas

The beauty of this dish is you can totally make it your own.  After all, no recipe is written in stone (well, OK... except if you're baking, which doesn't happen to be my forte for obvious reasons).  Want to take this dish all the way vegan?  Make it without cheese or use dairy free cheese replacements.  Not in the mood for beans?  Leave ’em out.  Prefer brown rice to quinoa?  Swap it.  Feel like adding an animal protein?  Go for it!  The only thing you definitely don’t want to miss is, well, this dish... 

It’s a perfect balance of sweet and savory, with bursts of sweet potato and corn balancing out earthy mushrooms and beans, and a smokey chipotle sauce blankets the enchiladas before they are baked with sharp cheddar on top.  When I say this is what dreams are made of, I really mean it.  This is ACTUALLY what my dreams are made of.  If you find yourself dreaming about enchiladas too, then get cooking because I promise - this dish will make all of your enchilada dreams come true.  It's literally, the whole enchilada!

Micole Rondinone Roasted Vegetable Enchiladas

Roasted Vegetable Goat Cheese Enchiladas

Serves 3-4

  • 1 medium sweet potato

  • 1/2 cup loosely packed cooked white quinoa

  • 1/2 med-large zucchini

  • 1/2 large yellow onion

  • 1/2 cup frozen sweet corn

  • 1/2 cup black beans, rinsed

  • 4-5 Baby Bella mushrooms

  • 1/4 tsp adobo seasoning

  • 1/4 tsp cayenne pepper

  • 1/4 tsp smoked paprika

  • 1/2 tsp chili powder

  • 1 tsp garlic powder

  • Sea salt to taste

  • EVOO

  • Flavorful salsa of your choice (I used Brad’s Organic Salsa but also like La Esquina’s Salsa Roja)

  • 1 small can Goya Salsa Chipotle or similar Chipotle Marinade or Enchiladas Sauce (not to be confused with Chipotle Peppers in Adobo Sauce)

  • 1 small log herbed goat cheese (or vegan alternative like Kite Hill Chive Spread or Treeline French Style Herb-Garlic)

  • 2-3 slices sharp cheddar (or vegan alternative like Daiya slices)

  • 6-8 corn tortillas depending how many you’re serving

  • Additional toppings optional: Fried egg, sliced radish, fresh cilantro, avocado, Pico de Gallo, crema

Preheat your oven to 400 degrees.  We’re going to start by prepping all of our vegetables.  Remove the skin from the sweet potato and cut down first into rounds, and then down further into fourths.  In a bowl, toss the sweet potato with a splash of extra virgin olive oil, roughly 1/4 tsp sea salt and 1/4 tsp adobo seasoning.  Lay your sweet potato pieces onto a baking sheet in one layer, which will allow them to cook evenly and get perfectly crispy.  Bake on the top rack of your oven for roughly 15 mins.  You want the sweet potato to be golden and crispy, so leave it in a little longer if it doesn’t look ready after 15 minutes.  I do recommend setting a timer though so you don’t forget to take your sweet potato out while you’re prepping your other ingredients!

In the meantime, you can get to work on dicing the onion, zucchini, and portobello mushrooms.  If your quinoa is not already cooked, this would also be a good time to throw it in a pot and cook according to box directions.  To keep my quinoa nice and tender, I like to add a splash of extra virgin olive oil to the water after it boils and before I let it simmer.

In a bowl combine your cooked quinoa, diced zucchini, and mushrooms.  Keep your onion, corn, and black beans to the side. 

Over medium heat, add a heaping tbsp of extra virgin olive oil to a deep sauté pan.  Once the olive oil starts to shimmer and heat up, add your onions and let them cook down.  They should start to soften and become transparent.  Next you can throw in your rinsed black beans, corn and the rest of your spices.  Here I encourage you to add salt to the eye - trust your gut - but if you’re really unsure, start with a 1/2 tsp.  You can always use a spoon to taste and add salt later if needed (just remember if you’re cooking for others, not to double dip).  After 5 or so minutes of letting the ingredients cook together, add the quinoa and vegetables.  Stir everything together thoroughly so that you combine all the flavors in the pan.  You can turn the heat down a bit here so as not to overcook any of your ingredients.  This is a good time to give your filling a taste and adjust the flavors as needed.  Add more garlic powder if you love garlic, more salt if it’s bland, or more cayenne if you like more heat.  Then turn the burner off and put the pan to the side.

Prep a baking dish by brushing or spraying with a little olive oil (you can also use coconut or avocado oil if you prefer).

Now we assemble!  Before you start, notice if your quinoa and vegetables have become overly dry in the pan.  If they have, you can always add a small glug of olive oil and mix, to loosen it up. 

To soften your tortillas, dampen a paper towel and wrap around the tortillas.  Place them on a microwave safe plate and hit them with 30 seconds.  When you pull them out, they should be steamy, soft and pliable.  Now, taking 1 tortilla out of the paper towel at a time, we quickly coat (or spray) one side of each tortilla with olive oil, or your cooking oil of choice.  Flip over and smear the other side with a little goat cheese.  Add a few pieces of your roasted sweet potato and a tablespoon of your filling, being careful not to overfill your tortillas. 

Carefully roll, and place into the baking pan, seam side down.  Continue until all your tortillas are filled and rolled.  Keep in mind that it's okay if a little of your filling spills out as you transfer them to the baking dish - they don't have to be totally perfect.  You can always nudge the filling back in using a spoon.

For the sauce, if you cannot locate the Brad's Organic Salsa or Goya Home Style Chipotle Sauce (https://www.walmart.com/ip/Goya-Home-Style-Chipotle-Sauce-7-oz/199898824) that I used, you can also look in the International Aisle of your local grocery store for any red enchilada sauce and a salsa that appeals to you, and mix them to taste! You can also opt to make your own if you’re feeling really ambitious.

To mix, pour into a measuring cup 1/4 cup of Brad’s Organic salsa, and then fill the rest of the way to 3/4 cup with Goya Chipotle Sauce. Mix together, and then pour over tortillas as evenly as possible.  Place 1 slice of cheddar cheese on top of each rolled tortilla.  Place in the oven and bake on 400 for 20 mins, or until cheese is bubbling and golden.

You can serve with a fried egg to make this a delicious brunch, and top with any of your favorite toppings: radishes, crema, avocado, guacamole, pico de gallo, or fresh cilantro. The world is your oyster!

Pork Tostadas with Grilled Tomatillo Salsa & Grilled Peach Pico

I could eat tostadas every day.

And I wrote this recipe as a last-ditch effort to stop throwing so much money at chorizo tostadas from my favorite neighborhood spot. Combining pork breakfast sausage with smokey cumin seed, ginger, and miso creates a base of layered flavor profiles. Combine that with just-fried salty tortillas, sour cream and not one, but two, homemade salsas, and you’ll reach taste bud nirvana.

 
Micole Rondinone Pork Tostadas
 

Pork Tostadas with Grilled Tomatillo Salsa & Grilled Peach Pico

For Tostadas

  • 6 x Corn Tortillas

  • Neutral oil for frying, 8 - 16 oz depending on the size of your pot

  • Coarse kosher salt

  • Alternatively, packaged tostadas

For Pork

  • 12 oz ground breakfast sausage (or buy whole breakfast sausages and remove casing)

  • 1 tsp raw minced garlic

  • 1 tsp raw minced ginger

  • ½ tsp cumin seed

  • 1 ½ white miso

  • 1 Tbsp paprika

  • 1 Tbsp lime juice

  • Sour cream

  • Grilled Tomatillo Salsa

  • Grilled Peach Pico

Start by prepping your salsas. They come together quickly and will keep in your fridge for tostada leftovers, or for eating with other meals throughout the week.

In a medium/large pan, heat a little neutral or olive oil, just enough to lightly coat the bottom. Add minced ginger and garlic and cook until light golden brown, being sure not to burn. Then, add your ground pork, breaking up the meat with a spoon or spatula, and letting it brown all over. After a minute or two, add paprika and cumin seeds. Mix and continue to cook a few minutes, letting the pork get crispy in its own fat. Then, turn the heat down and stir in your miso. After a few minutes you can turn the heat way down, or completely off while we make the tostadas.

When it comes to frying at home without a deep frier there are a few things to keep in mind.

First, you’'ll need a decent amount of neutral oil. Neutral oils, like safflower, canola, and other vegetable oils have a high smoke point, meaning they can safely be heated to a temperature high enough to fry your food. Ideal temperature for frying is between 350-400F.

You’ll also need a large pot or a high walled sauce pan or cast iron pan. For our needs, your pot must at least be larger in diameter than your tortillas. A good rule of thumb is that you should use enough oil in your pot to fully submerge your food, but so it comes no more than half way up the sides of the pot. The reason for that is when you add ingredients, their inherent moisture causes the oil to bubble up and you do not want a spill over of hot oil.

Since we’re frying something flat (tortillas), you won’t need quite as much oil here. I used roughly 8 oz of oil in a 10 inch cast iron pan.

Another important rule of thumb for frying is to remember that dryness is key. You always want your ingredients as dry as possible and never want to get water in or near hot oil as it could cause it to splash or even dangerously boil over. In our case, tortillas are inherently dry already, so just make sure you keep water away from your pot and tools while frying.

Start your oil over a medium heat, bringing it up to 350F, using a frying or candy thermometer to carefully check. Once oil is hot enough, using stainless steel, high temperature safe tongs, carefully lower in your first tortilla. If the oil is hot enough, bubbles will form around it when added.

Keep an eye on the tortilla, flipping it after a minute or two to evenly fry on both sides. When the tortilla is light golden brown on both sides, carefully remove and place on a paper towel to drain grease. Take care that tortilla will be hot, but immediately sprinkle both sides with coarse salt.

It’s important not to add too much food to your frying oil at once, as this drops the temperature of the oil, and your food will come out soggy, so I recommend just frying tortillas one at a time.

Once all tortillas have been fried, reheat your ground pork over a medium heat. On each tortilla, spread a large spoonful of sour cream. Top with ground pork and peach pico. Finish with a few dollops of your grilled tomatillo salsa, and eat immediately.

SAFETY NOTES: “Never use water, flour, or sugar to put out a grease fire… and do not try to carry a flaming pot outdoors. To suffocate a fire, use baking soda, a damp towel, or a fire extinguisher specifically designed for grease fires.” - MORE ON DEEP FRYING AT HOME CAN BE READ HERE

Low & Slow Goat Cheese Eggs

I’m not sure what’s worse than dry scrambled eggs.

I make very few exceptions in regards to my distaste for scrambled eggs and largely because they are often overcooked, becoming rubbery chunks I simply do not find appealing. Two notable exceptions however are 1) Australian Folded Eggs, gifted to my consciousness via The Kitchn and 2) Bobby Flay’s eggs at his now closed New York restaurant, Gato. Although these two dishes are made using differing techniques, what they share is the resulting soft, custardy deliciousness that can be scrambled eggs, when cooked the right way.

Borrowing from Gato’s addition of creme fraiche, goat cheese is mixed into these eggs before they’ve started to cook, and going slow allows you to make sure the eggs come off the heat just when they’ve transformed from raw to deliciously custardy.

 
AM2A6391.jpg
 

Low & Slow Goat Cheese Eggs

  • 4 eggs

  • 1.5- 2 Tbsps Soft Goat Cheese, preferably from a log and not precrumbled

  • Freshly ground black pepper

  • Butter or Extra virgin olive oil

  • Sea Salt

  • OPTIONAL: sprinkle eggs with your favorite finishers, I like chives and aleppo pepper

Take goat cheese out to bring to room temp.

Whisk 4 eggs together with a few cranks of freshly ground pepper and about ¼ tsp of sea salt.

Over low heat - start a non stick pan with a little pat of butter, or olive oil.

Once butter has melted or oil is warm, add eggs. The pan shouldn’t be so hot that the eggs start cooking when they hit the pan. Add about 1.5-2 Tsps softened, crumbled goat cheese.

With a spatula, start gently mixing the eggs in the pan. The idea is to create folds of softly cooked egg. Continue folding in a circular manner until the eggs are gently cooked with creamy layers in between. Put into a bowl and top with fresh chives and any of your other favorite toppings.

Goat Cheese & Honey Breakfast Toast

One of my all time favorite breakfasts.

If you follow me over on my Instagram, you see me eat this constantly, in a million different ways. The ingredients you can’t do without out? The goat cheese & the honey.

 
Micole Rondinone Avocado Toast
 

Goat Cheese & Honey Breakfast Toast

  • 2 whole eggs

  • 2 slices of good bread, I like a great sourdough

  • 1 - 1.5 Tbsps Goat cheese

  • 1 ripe avocado

  • Maldon salt or kosher salt

  • Freshly ground black pepper

  • Aleppo pepper or red chili flakes

  • Extra virgin olive oil

Take out your goat cheese to give it time to soften at room temperature. Toast the bread in a toaster or in a hot pan with a little bit of cooking fat, flipping after the first side is golden. In a non-stick pan, add olive oil and allow to get hot, waiting until it shimmers.

In the meantime, crack eggs carefully into a bowl, making sure no pieces of shell have fallen in. When your pan is hot add the eggs, being careful not to break the yolks. Sprinkle with a little sea salt and black pepper.

Spread your goat cheese on the warm toast and then place half of a sliced avocado down on each piece of bread.

When the white of your eggs has cooked through almost completely and isn’t looking wobbly, flip the eggs carefully, allowing it cook for just a moment more, and then immediately remove from the heat and place on your toast. If you like a more well done yolk, give it an extra minute over the heat.

Drizzle with honey and sprinkle with my favorite, aleppo pepper, or red chili flakes, and a bit of Maldon salt (kosher salt works here too). Eat promptly while warm and delicious.

End of Summer Nachos

Crispy, creamy, and spicy...

What’s not to love about eating nachos?  By their very nature they allow for a layering of intense flavor that excites the palette, and this version does not disappoint.  Each bite combines sharp, gooey jack and cheddar cheeses, pico de gallo made with stunning heirloom tomatoes, the sweetest grilled summer corn, spicy chicken, pickled onions and creamy avocado poblano salsa.  And the best part about making your nachos at home is that you can be sure to layer the chips and toppings evenly to avoid the dreaded empty-chip bottom.  In my opinion there is no better way to celebrate the end of summer than outside with friends, sharing a plate of nachos and perhaps toasting with a watermelon margarita.

While the below recipe does outline a bit of advance prep work, you can also choose to skip those additional steps and save time by buying pre-made ingredients instead (no shame in that game!).  I opted to make my own chips (which are surprisingly easy), pico de gallo, crema, and pickled onions, all of which are outlined in the recipe below.  This dish can either be a fun afternoon of cooking and D.I.Y-ing it all, or more of a quick throw-together.  Choose your own adventure!

Micole Rondinone End of Summer Nachos

Making these nachos before the summer tomatoes and corn are gone from the farmer’s market makes this dish extra special, but of course they can be modified for any time of the year.  Off-season tomatoes aren’t the same but they’ll do, and good quality frozen corn charred in a cast iron pan is fine.  And for my fellow New Yorkers who do not have the luxury of a backyard or a grill, use a Lodge Cast Iron grill pan to make the best grilled food year round.

The other thing I love about nachos is that they are fully customizable: is your vegetarian cousin coming to the party?  Make grilled portobellos in place of chicken.  Want to make sure your vegan friend can partake?  Sub in your favorite dairy-free cheese alternatives and swap sour cream for a dollop of Kite Hill spread

And speaking of dairy free, the avocado poblano salsa these nachos are served with is vegan friendly and worth the extra 10 minutes it takes to whip up.  Even if you opt for store-bought chips, pico and sour cream, this salsa is not to be missed.  Put a scoop on top and serve the extra on the side for dipping.  It's seriously addictive. I won't tell if you eat the whole bowl yourself, I promise.

Micole Rondinone End of Summer Nachos

End of Summer Nachos

  • 18 small corn tortillas (or 1 large bag of corn tortilla chips if you aren't making chips - I like Xochitl brand)

  • 1 lb. boneless skinless chicken breast, or 2/3 large portobello mushrooms for vegetarian/vegan

  • 1 block sharp yellow cheddar cheese (for vegan, replace with Daiya or Siete Foods)

  • 1 block pepper jack cheese (for vegan, see above)

  • 2 fresh corn cobs (ideally when in season)

  • 2 jalapeños (or 1 jalapeño if you aren't making pico de gallo or pickled onions)

  • 2 medium heirloom tomatoes to make your own pico de gallo (or 1 container pre-made pico de gallo)

  • 6 limes (or 4 limes if you aren't making pico de gallo and chips)

  • 1 bunch fresh cilantro

  • 1 poblano pepper

  • 1 long red pepper

  • 1 ripe avocado

  • 1 medium red onion (2 if you are making pickled onions)

  • 8 oz. container Sour Cream (for vegan, use Kite Hill spread)

  • 1 can black beans (I prefer Brad's Organic but any will do)

  • Extra Virgin Olive Oil

  • Sea Salt

  • Cayenne powder

  • Garlic powder

  • Smoked Paprika

  • Adobo Seasoning

  • Chili Powder

  • OPTIONAL: Cotija or queso fresco for shaving on finished nachos, red radishes, and any other nacho toppings you love

** If you are feeling ambitious, make the home-made versions of the chips, crema, pickled onions and heirloom pico de gallo in advance.  Recipes for all four are at the bottom of the page, and should be prepared in advance of the following steps.  If you are short on time, buy them pre-made and start here: 

First thing to do is make the poblano salsa.  If you are grilling, you can put your poblano on the grill and allow the pepper to blister evenly all over.  If not, use your oven and put it on a high broil setting.  Place the clean poblano pepper on a baking sheet on the top shelf.  You will need to monitor the pepper, leaving it up to 8 minutes or until it starts to blister and the skin starts to char.  Then turn to the other side, and again watch for blistering, 5-8 minutes.  Once the pepper is blistered evenly on all sides, remove from the oven. 

Do not touch the pepper as there will be very hot steam underneath the blistered skin, so remove carefully.  Set aside and let cool to room temperature.  Once cool to the touch, cut off the top, cut down one side lengthwise and remove the seeds inside.  Place the entire pepper into the bowl of your food processor.  Then add juice of 1 whole lime, 1 avocado, ¼ tsp salt, ½ jalapeno, and 3 tbsps olive oil and run the food processor until all ingredients are broken down and the consistency is creamy.  Adjust salt to taste.  Put in a small jar with a tight top and put in the fridge.

Next shred roughly 1 cup of cheddar and 1 cup of pepper jack cheese and combine in one bowl.  Stick in the fridge to use later.  If you like your nachos extra cheesy, you should shred extra.  To make these nachos vegan, you can add your favorite melty vegan cheese alternative (I personally prefer Daiya, but Whole Foods carries other alternatives like Chao, or "queso" sauce alternatives like Heidi Ho and Siete Foods).  Dollop Kite Hill's vegan chive spread on top when serving. 

Next let's grill our chicken and corn.  Remove husks from corn and rinse.  In a small dish, pour out a little olive oil and using a pastry brush, brush olive oil all over the corn.  If you don't have a pastry brush, you can use your hands.  Squeeze juice of 1/2 a lime over the corn and sprinkle with sea salt.  Put on the grill, turning until slightly charred on all sides.  Then set aside.  If you do not have access to a grill, use my favorite Lodge Cast Iron grill.

Marinate your chicken breasts in a large bowl with 2 tbsps EVOO, juice of ½ lime, ⅛ tsp cayenne, ¼ tsp garlic powder, ¼ tsp smoked paprika, ½ tsp adobo seasoning, ¾ tsp chili powder, and ½ tsp sea salt.  Mix until breasts are covered equally all over with the spice mix.  Let marinade for 30 minutes if you have the time, or throw right on the grill, cooking approximately 8 minutes on the first side, then flipping and allowing the chicken to cook another 8 minutes, or until chicken is completely cooked through and no longer pink inside.  If you have a meat thermometer, chicken should have an internal temperature of 165 degrees fahrenheit.  Once chicken is done, set aside to rest. 

Want to make this dish vegetarian?  Try marinating and grilling portobello mushrooms the same way, letting them marinate a bit longer to soak up all the flavor. 

Next add a can of black beans to a pan along with some of the juice from the can so that the beans stay moist.  Add sea salt to taste, a sprinkle of garlic powder and juice of half a lime.  Let the beans cook on medium-low heat, using the back side of a large spoon to crush the beans a little bit.  Once the flavors have all combined, about 8-10 minutes, turn the heat off and set aside.

Let's cut our corn off the cob.  Stand one of your grilled cobs upright in a bowl and carefully use a sharp knife to cut down the cob lengthwise, shaving the kernels off.  Do this to both cobs and set aside.

Now it's time to put everything together! 

Before you start building the nachos, preheat your oven to 350 degrees.

If you made the homemade chips in advance (recipe below), grab those now.  If you opted for store bought, no worries.  Lay your chips out in a single layer in a medium pyrex dish (2.2 qt or 3 qt will do).  You can also use a baking dish but preferably something with sides so you can get layers going.  

Evenly sprinkle some of your mix of shredded cheeses, then some of the grilled corn and cooked down beans.  Then you'll lay down a second layer of chips, and do the same.  Finally, add a third layer of chips, cheese, beans, and corn as well as your grilled chicken (or portobellos for vegetarian).  Add a little more cheese on top of everything.

Stick in the oven at 350 for 15-20 minutes.  Nachos should be crispy and golden brown on top. 

Once done, carefully pull out of the oven and get to topping!

Drizzle citrus crema (recipe below), or top with sour cream for a shortcut.  Sprinkle with pickled onions and peppers (recipe below).  Finally, finish with a nice big scoop of pico de gallo (recipe below) and that incredible avocado poblano salsa.  Add some more fresh cilantro, and sliced radish if you like it.  Serve with all the extra toppings on the side so people can dip as they please, and most of all, enjoy every last crunchy bite!

AM2A1480.jpg

HOMEMADE BAKED TORTILLA CHIPS

There’s nothing like homemade, crunchy baked tortilla chips.  It's actually insanely simple, and in my opinion, worth the end result.

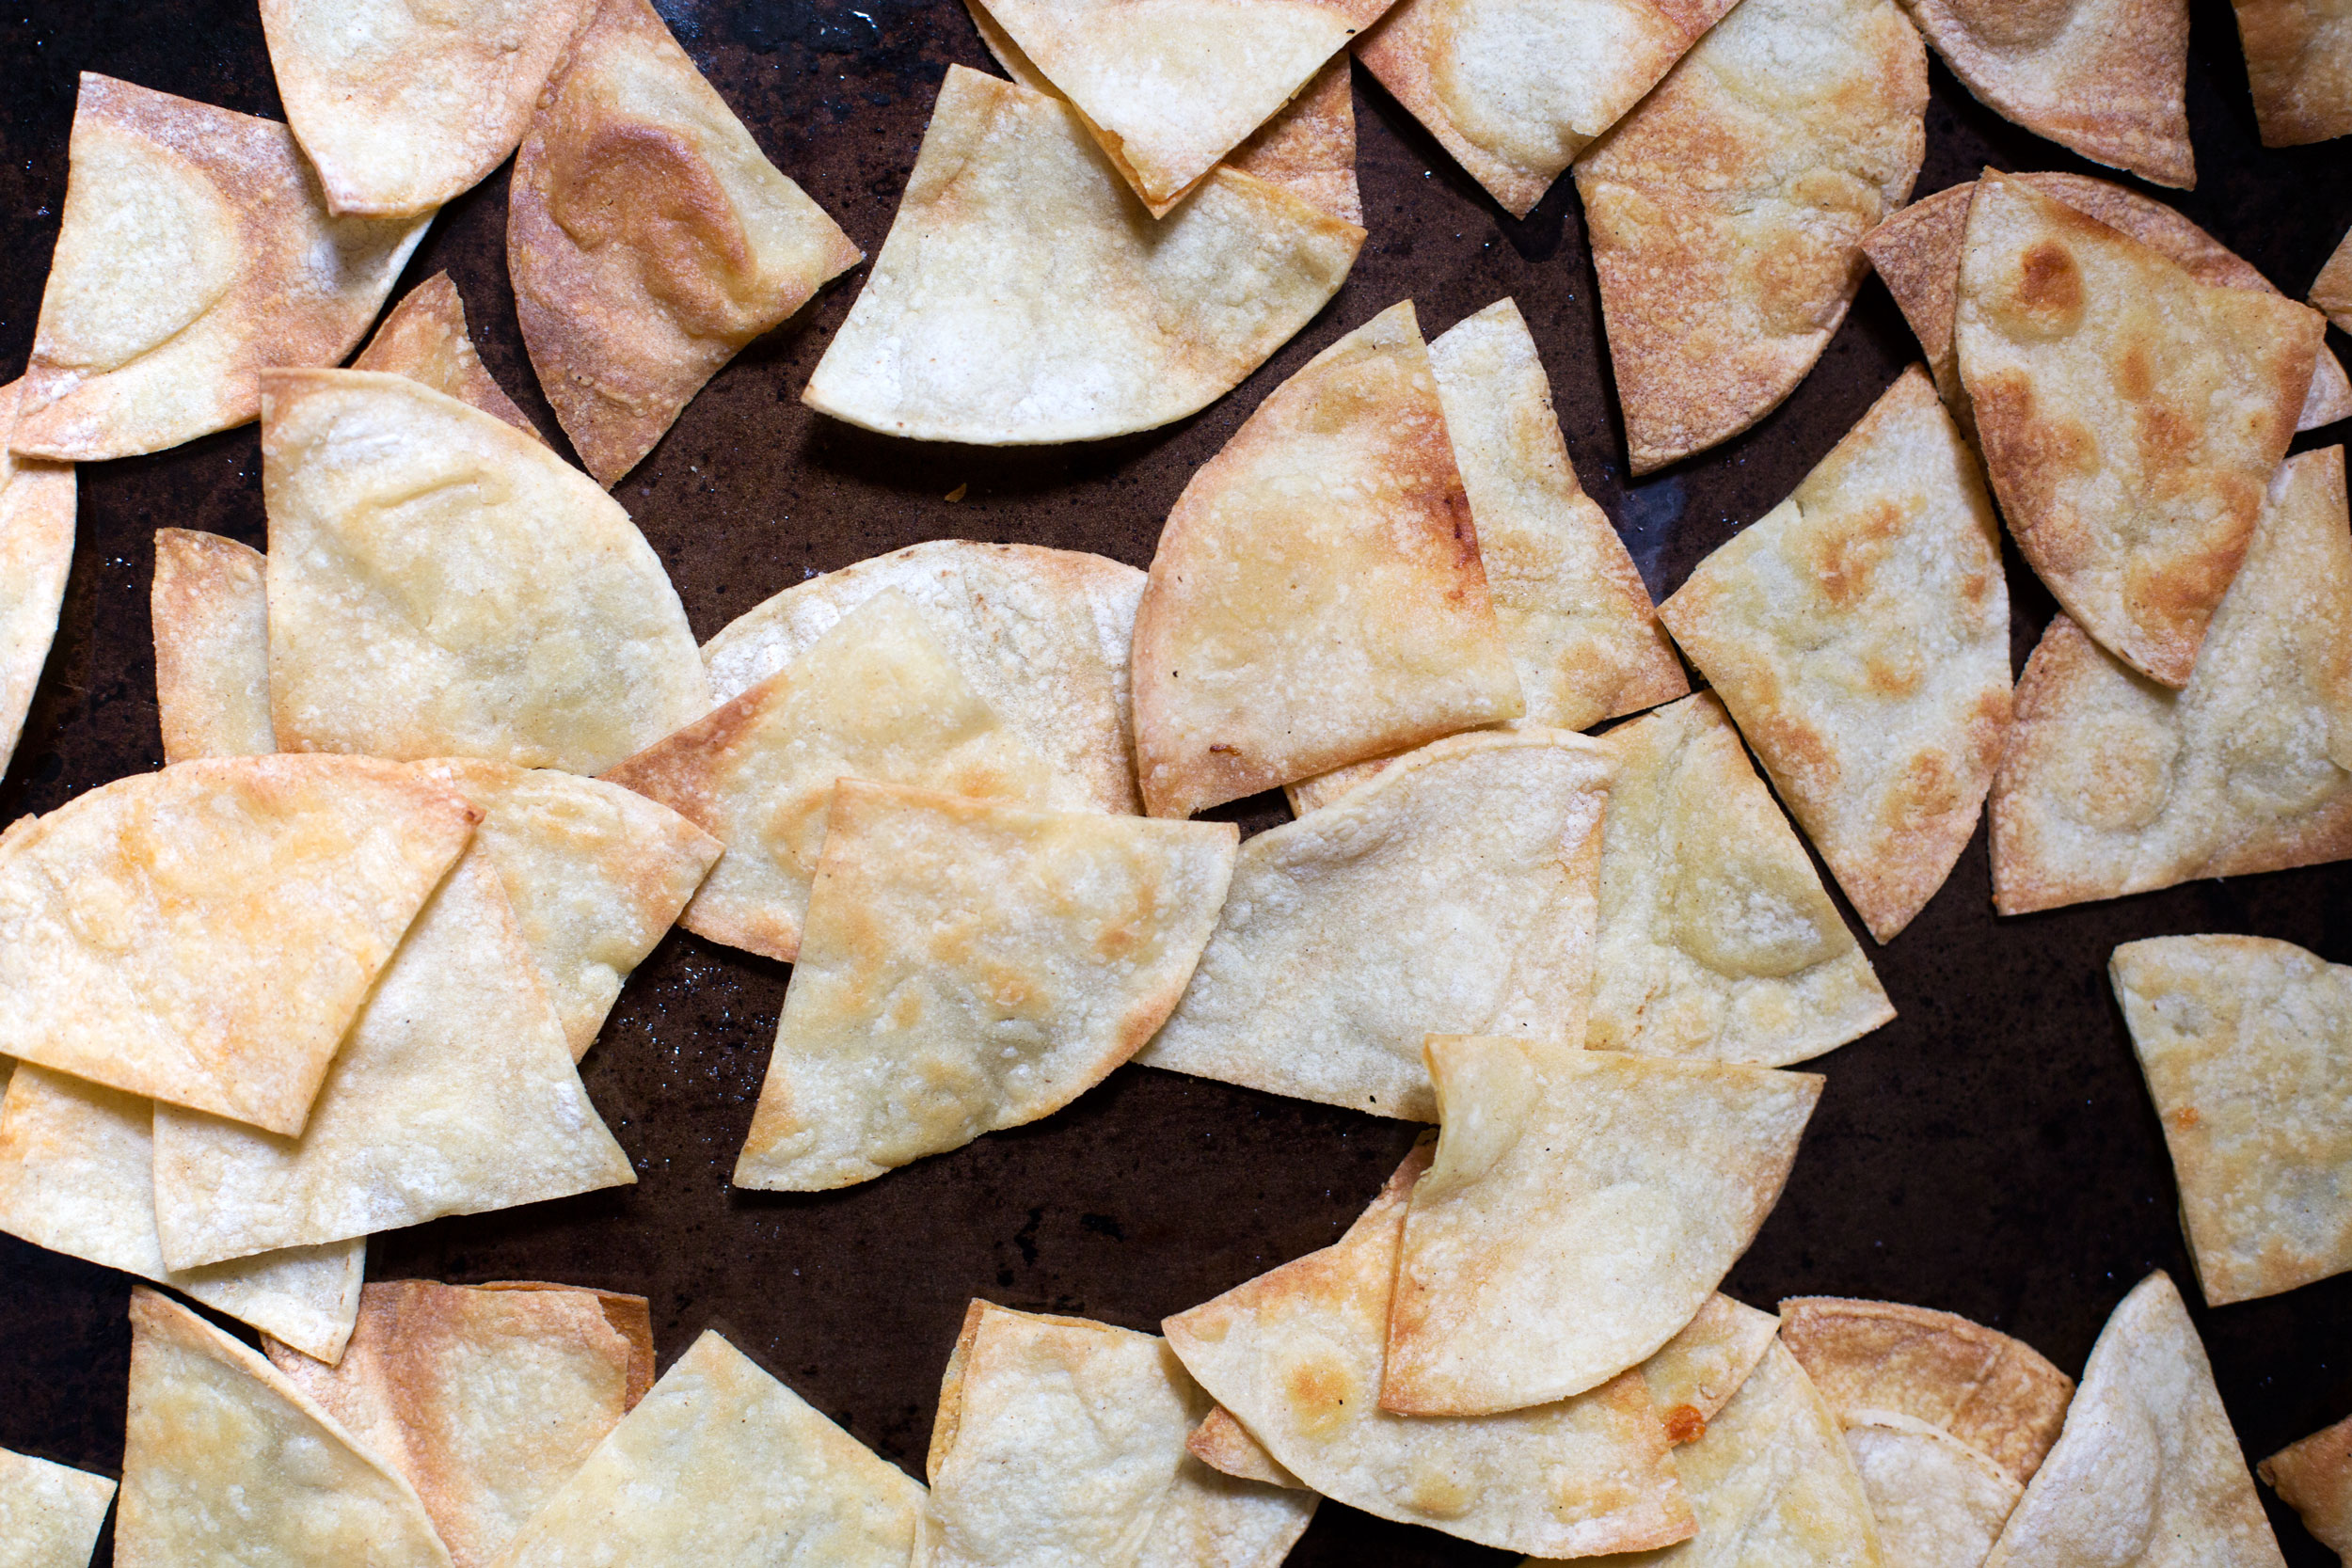
Preheat your oven to 350.  Remove 18 corn tortillas from the bag, and 6 at a time, cut them down the middle into two halves, and then again into quarters.  Set all your quarters aside.

In a small dish, combine about 6 tbsps olive oil and juice of a small lime.  

Lay out 6 tortillas, or 24 quarters, onto a baking sheet in a single layer.  Depending on the size of your oven, lay 6 more tortillas out on a second and third baking sheet, or do this in batches.

Using a pastry brush, brush a little of the olive oil mixture onto each of the tortilla pieces.  Then flip and do the same on the other side of each piece.  Sprinkle the entire tray with sea salt.

Put the baking sheet into the oven and bake for 8-10 mins on the first side, checking along the way as all ovens are different, that the bottom side is golden brown.  Then flip and do another 5-10 mins on the second side until golden and crunchy.

If you are doing this in batches, repeat until all tortillas are done.  Combine in one bowl and toss with a little more sea salt if they need it.  I recommend making these the day of.

AM2A1454_rotated.jpg

HEIRLOOM PICO DE GALLO

To prep the pico de gallo, using a serrated knife, dice half of a medium sized green heirloom tomato and half of a medium red heirloom tomato and add to a mixing bowl.  Cut off 3 rounds of red onion, dice into small pieces and combine in the bowl with the tomato.  Dice half a jalapeño into small pieces and fold in with the other ingredients (without seeds if you want less heat).  Add lime juice and sea salt to taste.  Cut off some clean cilantro leaves from the bunch and finely chop.  Add to the salsa, mix and adjust seasoning as needed. This should render about 1 cup of pico de gallo but use the entire tomatoes to make more, adding more of the other ingredients as well.  This is all to taste, so add more of anything you like. Trust your culinary intuition! Keeps in the fridge 2-3 days.

PICKLED ONIONS

To pickle the onions, cut one whole red onion into thin rounds and then chop rounds into halves.  Use the other half of the jalapeño and cut into rounds (without seeds for less heat). Add jalapeño and onions to a clean 8 oz jar. In a bowl, mix 1/2 cup apple cider vinegar, 1 tablespoon sugar and 1 1/2 teaspoons kosher salt and mix until the salt and sugar have dissolved.  Then pour the mixture into the jar so that they fully submerge the onion and jalapeño. Cover and let sit at room temperature for up to an hour.  Then store in the fridge.  You can make this up to 1 week in advance. 

CITRUS CREMA

To make your own citrus crema, to a bowl add 5 Tbsps of sour cream, juice of ½ a lime and a sprinkle of sea salt and whisk.  Keep in the fridge until ready to use.  Make this the day of.

Crispy Aleppo Chickpeas

Spicy, crunchy chickpeas with a hint of citrus…

Speckled with the beautiful flavor and color of Aleppo pepper. I will summarize if you don’t feel like reading on: these chickpeas are always a good idea. They have become a weekly staple in my fridge because of their versatility. I eat them on their own. I eat them in salads. I eat them under a fried egg. I eat them in the morning or late at night. Lest this turn into an ode to chickpeas à la Green Eggs and Ham, let’s cut to the chase. You should make these chickpeas … soon.

AM2A2175.jpg

The key ingredient may require a little forethought: aleppo pepper. While this isn’t a spice most of us have lying around next to the salt and pepper, it absolutely should be. Hailing from Syria and Turkey, this beautifully hued pepper is, according to Healthyish, “…about half as hot as crushed red chile flakes…”. So, bring this dish to your next dinner party and it will easily accommodate both your friends who like heat and those who don’t. Plus it will sound impressive when you announce that it’s your new favorite spice.

I encourage you to be heavy handed on the Aleppo pepper and on the lemon. Let the chickpeas cook longer than you think, giving them ample time to get crispy. Make the dish even more savory by adding some chopped baby bella mushrooms and letting those cook down in the mix — a drizzle of yogurt on top and it’s all dressed to impress. Or make them simply like I did here for a perfect brunch, paired with garlicky kale and a fried egg.

AM2A2079.jpg

Crispy Aleppo Chickpeas

  • 1 can of chickpeas

  • 1 medium lemon

  • 3 garlic cloves

  • Extra virgin olive oil

  • Aleppo pepper

  • Sea salt

  • OPTIONAL: Kale, eggs, garlic, baby Bella mushrooms, yogurt for drizzling, wildbrine Kimchi Sriracha (available at most Whole Foods)

First make the spicy chickpeas. You can make these in advance and use them for up to a week in salads, with eggs or as a side to any breakfast, lunch or dinner. Reheat them in a pan and serve crispy and warm.

In an 11’ frying pan, heat 2 Tbsps of olive oil over medium heat. Thoroughly rinse your chickpeas in a strainer of all the liquid from the can. Pat dry with a kitchen towel or paper towels. Add clean, dry chickpeas to the pan, patting them down into a single layer. After 2-3 minutes, add ½ tsp of sea salt,1 heaping tsp of aleppo pepper and 2-3 finely chopped garlic cloves. Mix frequently to make sure nothing is burning and to scrape crispy aleppo pepper and garlic from the bottom of the pan. Pat chickpeas back down into a single layer. If your garlic or spices are starting to burn, turn the heat down a little. Cook another 5 or so minutes, until golden.

If you want to add chopped mushrooms, add them now, allowing them to become tender and then adjusting seasoning as needed.

Remove pan from the heat and add juice of half a large lemon and mix, scraping the bottom of the pan.

Serve chickpeas warm on their own, topped with another good squeeze of lemon juice, and maybe a drizzle of yogurt.

For a perfect breakfast, move your cooked chickpeas to a bowl and cover to keep warm. Clean and use the same pan to cook up your garlicky kale and a fried egg.

Clean and cut kale: remove the tough stem by cutting the leaf away from the spine on each side with a sharp knife. Fold leaves and roughly chop.

In your clean pan, heat 1 Tbsp olive oil over medium heat until it starts to shimmer. Add at least 1 large handful chopped raw kale to the pan and let it begin to soften, about 2 minutes, stirring often to cook evenly. To the pan add 2 finely chopped garlic cloves. Cook a few minutes more until wilted, sprinkle with sea salt to taste, then remove from the heat and put on a plate. Again in the same pan, add a splash of olive oil and allow to get hot so you can fry your egg: add egg without breaking the yolk to the pan - it should sizzle a bit when you drop it in. You want the bottom to get crispy and the whites to set, while the yolk remains runny. Monitor the heat so it doesn’t cook too quickly, and use a cover to use the power of steam to set your whites if they’re taking a bit of time. Just keep an eye so you don’t cook your yolk. Gently remove the egg and place on top of greens. Spoon chickpeas onto the plate. Serve with condiments of your choice. I love pairing it with spicy, tangy wildbrine Kimchi Sriracha (available at most Whole Foods).